SEARCH RESULTS
24 results found with an empty search
- Single-Ply Roofing Explained: A Complete Guide
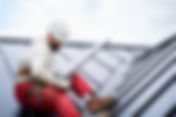
When it comes to protecting low-slope roofs, single-ply membranes have become something of a modern standard. Perhaps you've seen them on commercial buildings, or maybe you're exploring options for a flat roof extension. Either way, understanding what single ply roofing actually involves can save you time, money, and potentially a few headaches down the line. This guide walks through the essentials, what these systems are, how they work, and whether they might suit your project. No fluff, just practical information presented in a way that's actually readable. What Exactly Is Single-Ply Roofing? Single-ply roofing systems consist of a synthetic membrane, typically one layer of flexible sheets made from rubber or thermoplastic materials. Think of it as a waterproof flat roof covering that's designed specifically for low-slope roofs where traditional pitched roofing simply won't work. The term "single layer" is key here. Unlike older built-up roofing systems that required multiple layers of felt and bitumen, this approach uses just one membrane. It's straightforward, which is part of the appeal. These ply membranes come in wide rolls, some as broad as 50 feet, which means fewer seams across your roof. Fewer seams generally translate to fewer potential weak points where water might sneak through. The material itself is engineered to handle UV exposure, temperature fluctuations, and the general wear that comes with being permanently exposed to the elements. The Main Players: TPO, EPDM, and PVC Three types dominate the single-ply market, each with its own characteristics: EPDM (Ethylene Propylene Diene Monomer) is a synthetic polymer, essentially a rubber membrane. It's been around since the 1960s and has a solid track record. Black EPDM absorbs heat, whilst white versions reflect it. The material is flexible, resistant to ozone and UV damage, and handles temperature swings quite well. TPO (Thermoplastic Polyolefin) is a newer option that gained traction in the 1990s. It's a single-layer thermoplastic that's heat-weldable, meaning seams are fused together using hot air. TPO roofing typically comes in white, which makes it popular for energy-efficient applications. It offers flexible performance in various climates. PVC (Polyvinyl Chloride) is another thermoplastic option. PVC membranes have been used commercially for decades and are known for chemical resistance, useful if your roof might be exposed to oils, grease, or industrial pollutants. They're also heat-welded and available in different colours, though white remains most common. Membrane Type Material Composition Typical Colour Seam Method Best For EPDM Synthetic rubber Black or white Adhesive or tape Residential projects, cost-conscious builds TPO Thermoplastic polymer White (mainly) Heat-welded Energy efficiency, commercial roofs PVC Polyvinyl chloride White, tan, grey Heat-welded Chemical exposure, high-traffic roofs How Single-Ply Systems Work A complete roofing system involves more than just the membrane itself. Beneath the visible surface, you'll typically find insulation, possibly a cover board, and the roof deck. The membrane is the waterproofing layer, the final defence against rain, snow, and moisture. Installation methods vary, but three approaches are most common: Mechanically fastened systems use screws and plates to secure the membrane to the deck below. The fasteners go through the material and are then covered by the next sheet, creating an overlapping pattern. This method works well on roofs where adhesives might not bond properly, and it allows for some roof movement without compromising the seal. Fully adhered systems involve bonding the ply membrane directly to the substrate using adhesive. This creates a watertight bond across the entire surface. It's often preferred when wind uplift is a concern, as there's no risk of the membrane lifting at the edges. Ballasted systems take a different approach; the membrane is loosely laid (not fastened) and held down with gravel or paving slabs. This loose-laid system that is fixed in place through weight rather than mechanical attachment can be quick to install, though it's less common in Ireland due to wind considerations. The Role of Hot Air Welding For TPO and PVC membranes, hot-air-welded seams are what make the system truly waterproof. A specialist tool heats the membrane edges to the melting point, then presses them together. When done correctly, these seams are actually stronger than the membrane itself. It's one of those details that separates a durable waterproofing solution from one that might fail prematurely. EPDM works differently; its seams are typically bonded with adhesive tape or liquid adhesives. Both methods can be effective when installed properly, though they require attention to detail and dry conditions during application. Why Choose Single-Ply Over Alternatives? There are several reasons why single-ply roofing has become so widespread, particularly for commercial applications and larger residential flat roofs. Speed of installation is a major factor. Because single-ply is wide-width sheeting meant to cover large areas with minimal seaming, installation crews can complete jobs faster than with traditional multi-layer systems. Less time on site generally means lower labour costs. Weight is another consideration. These ply membranes are lightweight compared to built-up roofing or even some modified bitumen systems. That's useful when you're working on older structures where additional roof load could be problematic, or when you simply want to avoid reinforcing the existing structure. Durability varies by membrane type and quality, but well-installed single-ply roofing systems can last 20 to 40 years with proper maintenance. The materials resist UV degradation, don't rot, and handle thermal cycling reasonably well. Energy efficiency is possible, particularly with reflective membranes like white TPO or PVC. These surfaces bounce sunlight away rather than absorbing it, which can reduce cooling costs in buildings with air conditioning. Mind you, in Ireland's climate, this benefit is less pronounced than in warmer regions, but it's still worth considering for commercial buildings with significant cooling loads. Installation Considerations Getting single-ply roofing installed properly requires skilled contractors who understand the specific membrane they're working with. The surface preparation alone can make or break a project. The roof deck needs to be clean, dry, and in good condition. Any moisture trapped beneath the membrane can cause problems later, blistering, deterioration of insulation, or even structural damage over time. Debris, dust, or old roofing materials must be removed or properly prepared. Insulation is typically installed beneath the roofing membrane to improve thermal performance. The type and thickness depend on building regulations and your specific requirements. Some insulation types require a cover board between them and the membrane; for instance, expanded polystyrene (EPS) or extruded polystyrene (XPS) need protection, whilst polyisocyanurate (PIR) boards can often have membranes applied directly. Flashing details around edges, penetrations, and upstands require careful attention. These are where leaks most commonly develop, so proper detailing is essential. Pre-fabricated accessories are available for many systems, which can speed up installation whilst maintaining quality. Weather conditions during installation matter. Adhesives need appropriate temperatures to cure properly. Welding requires dry conditions. A rushed installation in poor weather is a recipe for future problems. Maintenance and Longevity Once installed, single-ply membranes don't require constant attention, but they're not entirely maintenance-free either. Regular inspections, ideally twice yearly, help catch small issues before they become expensive problems. Look for punctures, open seams, or areas where the membrane might have pulled away from flashings. After severe weather, a quick check is worthwhile. Keeping the roof clean prevents debris accumulation, which can hold moisture and potentially damage the membrane over time. Leaves, branches, and rubbish should be cleared regularly, particularly from drains and gutters where blockages can lead to standing water. Ponding water is perhaps the biggest enemy of any flat roof. Whilst single-ply membranes can handle some standing water, prolonged ponding (more than 48 hours after rain) can degrade the material and reduce its lifespan. Proper drainage design should prevent this, but if you notice persistent pooling, it's worth addressing. Minor repairs are usually straightforward. Small punctures can be patched, and seam issues can often be re-welded or re-sealed. Major damage might require more extensive work, but that's generally rare with quality installations. Common Applications Single-ply roofing shows up in various contexts, though you'll most commonly see it on commercial and industrial buildings with low-slope roofs. Retail units and warehouses often use these systems because they can cover large areas efficiently. The lightweight nature means they work well on steel-framed structures without requiring additional support. Residential extensions and conversions frequently employ single-ply membranes, particularly for flat-roofed additions. They're a modern alternative to traditional felt systems and generally perform better over time. Schools and public buildings appreciate the longevity and low maintenance requirements. A roof that can last 25+ years with minimal intervention represents good value for public sector budgets. Refurbishment projects sometimes use fleece-backed single-ply membranes that can be installed over existing roofing without a complete tear-off. This approach saves time and disposal costs whilst still providing a fresh, waterproof surface. Costs and Value Considerations Pricing for single-ply roofing varies based on membrane type, thickness, roof size, complexity, and labour rates. As a general rule, EPDM tends to be the most economical option, PVC sits at the premium end, and TPO falls somewhere between. However, focusing purely on initial cost misses part of the picture. A cheaper membrane that needs replacing in 15 years might cost more over its lifetime than a premium option lasting 30 years. Maintenance requirements, energy performance, and warranty coverage all factor into the true value equation. For suppliers like QBM in Ireland, the material costs represent just one component. Professional installation is crucial; a poorly installed premium membrane will underperform compared to a mid-range option installed correctly. When budgeting, account for proper preparation, quality materials, and skilled labour. Making the Right Choice So, is single-ply roofing the right solution for your project? The honest answer is: it depends. For low-slope or flat applications, single-ply membranes offer a proven, efficient option. They're particularly well-suited to: Commercial buildings where large, uninterrupted roof areas need covering quickly Projects where roof weight is a concern Situations requiring good chemical or fire resistance (PVC excels here) Refurbishments where re-roofing over existing systems makes sense Applications needing good weatherproofing with reasonable lifespan expectations They're less ideal for: Very small roof areas where the economies of scale don't apply Roofs with extremely complex shapes and numerous penetrations Situations where the aesthetic appearance of the roof is paramount Projects with ultra-tight budgets where simpler solutions might suffice Think about your specific requirements. Climate, building use, access for future maintenance, budget constraints, and expected building lifespan all play roles in determining the best approach. Frequently Asked Questions What's the difference between thermoset and thermoplastic single-ply membranes? Thermoset membranes like EPDM cure during manufacturing and won't melt when heated, they're bonded using adhesives or tapes. Thermoplastic membranes (TPO, PVC) can be repeatedly heated and welded, which is how their seams are joined on-site. Both types create effective waterproof barriers, but thermoplastic seams are generally considered stronger when properly welded. The choice between them often comes down to specific project requirements, budget, and installer expertise rather than one being categorically better than the other. Can single-ply roofing be installed over existing roof systems? Yes, in many cases. Fleece-backed versions of both TPO and PVC membranes are specifically designed for installation over existing bituminous roofs, provided the existing surface is in reasonable condition with minimal moisture trapped beneath it. This approach, sometimes called a "hybrid system", saves the cost and disruption of removing the old roof whilst still providing a fresh waterproofing layer. However, the existing roof must be thoroughly assessed first, as installing over severely degraded or wet substrates will only trap problems beneath the new membrane. How long does single-ply roofing typically last in the UK and Irish climate? Lifespan varies based on membrane type, thickness, installation quality, and maintenance. EPDM roofing systems generally last 20-30 years, whilst quality TPO and PVC installations can reach 25-35 years or beyond. The UK and Irish climate, characterised by moderate temperatures, frequent rain, and relatively low UV intensity compared to southern Europe, is actually quite favourable for these materials. The main threats are mechanical damage, poor installation, and inadequate drainage leading to ponding water. Regular inspections and minor maintenance can help achieve the upper end of expected lifespans. Is planning permission required for single-ply roofing installations? This depends on whether you're replacing an existing flat roof or creating a new one as part of an extension or new build. Replacing a flat roof with single-ply membrane typically falls under permitted development (no planning permission needed), provided you're not changing the roof line or adding to the building's footprint. However, if you're extending a property or working on a listed building, planning permission and building control approval will likely be required. Always check with your local planning authority before proceeding, as regulations vary and non-compliance can create costly problems later. What happens if a single-ply membrane gets punctured? Minor punctures and cuts can usually be repaired without replacing the entire membrane. For small damage, patches made from the same membrane material can be heat-welded (for TPO/PVC) or adhered (for EPDM) over the damaged area. The repair should extend well beyond the puncture to ensure a watertight seal. Larger tears or widespread damage might require more extensive work, potentially including replacement of affected sections. This is why regular inspections are valuable; catching and repairing small punctures early prevents them from becoming major leaks that could damage insulation or structure beneath. Get Expert Guidance on Single-Ply Roofing Solutions Choosing the right roofing system involves balancing numerous factors, performance requirements, budget constraints, building characteristics, and long-term value. Single-ply membranes offer a modern, efficient solution for many low-slope applications, but they're not one-size-fits-all. At QBM, we supply high-quality single-ply roofing materials throughout Ireland, working with contractors and builders who demand reliable products for their projects. Whether you're exploring EPDM, TPO, or PVC options, or you need guidance on which system suits your specific requirements, we're here to help. Contact QBM today to discuss your roofing project. Our team can provide technical information, product recommendations, and connect you with the materials you need to complete your installation successfully. We understand Irish building requirements and can help you navigate the options to find the right solution for your circumstances.
- Weighing Up Green Roofs: Benefits and Drawbacks
Living roofs have moved beyond being merely an architectural novelty. You see them on commercial buildings, residential extensions, schools, and even garden sheds. They're part of a broader conversation about how we build in ways that actually work with the environment rather than against it. But like any building solution, green roofs aren't universally perfect for every situation. There are genuine benefits, some quite significant, and there are real challenges to think about as well. Perhaps you're considering one for your project and want to know what you're getting into. Or maybe you're just curious whether the hype matches reality. This article walks through both sides: where green roofs excel, and where they might create complications. No sales pitch, no doom-saying. Just a straightforward look at what actually happens when you put soil and plants on top of a building. Understanding What Green Roofs Actually Are Before getting into the green roof pros and cons, it helps to know what we're actually discussing. A green roof is essentially a roof covered with vegetation, plants growing in a specially designed layer system that sits above the waterproofing membrane. These aren't just plants plonked onto a standard roof. The system typically includes several layers: Waterproofing membranes (often root-resistant) A drainage layer Filter fabric Growing medium (engineered soil) Vegetation The types of green roofs vary considerably. Extensive systems use shallow soil (roughly 5-15cm) with hardy, low-maintenance plants like sedum. Think of these as the "set and forget" option, minimal intervention needed once established. Intensive green roofs, on the other hand, have a deeper substrate (15cm to over 60cm) and can support diverse plantings, including shrubs, perennials,and even small trees. These become rooftop gardens, accessible spaces for people. Semi-intensive systems sit somewhere between, balancing accessibility with moderate maintenance. The Environmental Benefits: Where Green Roofs Shine Let's start with the positives, because there are quite a few genuine environmental benefits that make green roofs attractive. Improved Stormwater Management This is perhaps one of the most measurable advantages. Conventional roofs shed water quickly, which runs straight into drains and overwhelms infrastructure during heavy rainfall. Green roofs slow that process down considerably. The vegetation and soil absorb rainwater, holding onto a significant portion. Studies show green roofs can retain 50-80% of rainfall, releasing it slowly through evaporation and transpiration. This reduces strain on drainage systems and helps prevent flooding in urban areas. For Irish weather, characterised by frequent but often moderate rainfall, this stormwater management capacity is genuinely useful. It won't eliminate flooding on its own, but it's part of the solution. Reduction of Urban Heat Islands Heat islands occur in cities where concrete, asphalt, and dark roofs absorb sunlight during the day and release it as heat at night. Temperatures in urban centres can be several degrees higher than in surrounding areas. Plants naturally cool their environment through evapotranspiration. They absorb roughly 50% of sunlight for photosynthesis rather than converting it all to heat. Cool roofs help, but green roofs take it further by actually reducing ambient temperature. Research suggests widespread green roof installation could reduce urban temperatures by 2-3°C. That might not sound dramatic, but it makes a noticeable difference to comfort and can reduce heat-related health issues. Better Air Quality Green vegetation filters air pollutants. Plants capture particulate matter, absorb nitrogen dioxide and sulphur dioxide, and convert carbon dioxide into oxygen through photosynthesis. The scale matters here; one green roof won't transform air quality across a city. But collectively, green roofs can improve air quality in dense urban environments where pollution tends to concentrate. They improve air quality bit by bit, building by building. Biodiversity and Habitat Creation Urban development typically destroys natural habitat. Green roofs create new habitats in previously barren spaces. They won't replace lost woodland or grassland entirely, but they provide something. Birds, insects, and pollinators all benefit. Particularly when green roofs incorporate native plants suited to the local ecosystem, they become stepping stones for wildlife moving through urban areas. For cities trying to support declining pollinator populations, this habitat creation matters. Green Roof Type Soil Depth Plant Types Primary Benefits Maintenance Level Extensive 5-15cm Sedum, mosses, grasses Stormwater, insulation, low weight Minimal (1-2 visits yearly) Semi-Intensive 15-30cm Herbs, grasses, small perennials Balance of benefits and usability Moderate (quarterly attention) Intensive 30-60cm+ Shrubs, trees, and diverse plantings Recreation space, biodiversity High (regular gardening) Economic Aspects: Long-Term Value Environmental benefits are well and good, but most building decisions ultimately come down to costs and economic value. Green roofs have interesting financial dynamics. Energy Cost Reduction Green roofs provide additional insulation. The soil layer, typically 5-60cm depending on type, creates a buffer between the building interior and outside conditions. In summer, this reduces heat gain. Winter brings benefits too, though perhaps less pronounced given Ireland's mild climate. The result? Lower heating and cooling demands. Studies suggest energy cost reductions of 10-30%, depending on building design and climate. For commercial buildings with significant HVAC costs, this adds up. For residential properties, it's a more modest but still real saving. The plants themselves contribute by shading the roof surface and through evapotranspiration, which cools the surrounding air. Roofs covered in dark membrane might reach 60-80°C in direct sun. Green roofs rarely exceed ambient temperature. Extended Roof Lifespan Waterproofing membranes deteriorate over time. UV radiation, temperature fluctuations, and physical wear all take their toll. Most conventional flat roofs need replacing every 20-25 years. Green roofs protect the membrane. The vegetation and soil shield it from UV, moderate temperature swings, and prevent direct physical damage. Properly maintained green roofs can double or even triple membrane lifespan, reaching 40-50 years before requiring replacement. That extended lifespan offsets higher initial installation costs over time. You're essentially paying more upfront but saving on long-term roofing costs. Property Value Increase Buildings with green roofs often command higher property values and rental rates. The amenity value matters for intensive roofs where occupants gain accessible outdoor space. But even extensive roofs contribute through aesthetic improvement and demonstrated environmental commitment. Marketability improves, too. As sustainability becomes more important to tenants and buyers, green features differentiate properties in competitive markets. The Practical Drawbacks: What Makes Green Roofs Challenging Right, now for the other side. Green roofs create real challenges that need honest acknowledgment. Installation Costs Let's not dance around it: green roofs cost more than conventional roofing. Sometimes significantly more. Extensive systems are the most economical option, but they still run higher than standard membrane installation. Intensive systems can cost two to three times as much as conventional roofing, factoring in structural reinforcement, deeper substrate, irrigation systems, and planting. These installation costs include: Structural assessment and potential reinforcement Root-resistant waterproofing layers Drainage systems Growing medium (engineered soil isn't cheap) Vegetation and planting Access provisions for maintenance For new builds where green roofs are incorporated from the design stage, costs integrate more smoothly into overall budgets. Retrofitting existing buildings can be more expensive, particularly if structural upgrades are needed. Weight Load Considerations Green roofs are heavy. An extensive system adds roughly 60-150 kg per square metre when saturated. Intensive systems can exceed 300-500 kg per square metre or more. Not all buildings can support this additional load. Older structures, particularly, may require significant (read: expensive) reinforcement before a green roof becomes feasible. The structural engineer becomes your best friend during the planning stages. Weight considerations affect retrofit projects most severely. New construction can be designed for green roofs from the start, incorporating necessary structural capacity. But adding a green roof to an existing building might not be possible without major work, or at all in some cases. Maintenance Requirements "Low maintenance" doesn't mean "no maintenance." Even extensive green roofs need some attention. Maintenance tasks include: Inspecting drainage systems (blocked drains cause problems quickly) Weeding (yes, unwanted plants still find their way up there) Occasional fertilising Checking for dead or struggling vegetation Clearing debris Extensive roofs might need attention just 1-2 times yearly. Intensive gardens require regular care, watering during dry spells, pruning, and seasonal planting. Basically, it's gardening. On a roof. The maintenance costs vary depending on accessibility and system complexity. Budget for ongoing expenses, not just installation. Water Demand in Dry Conditions Here's an interesting wrinkle: during prolonged dry periods, green roofs may need irrigation. This seems counterintuitive for a solution meant to manage water, but shallow-rooted plants in thin soil can struggle during droughts. Ireland's climate generally provides adequate rainfall, but dry summers do occur. Intensive roofs with diverse plantings are particularly vulnerable and often require irrigation systems. This adds both installation and operational costs (pumps use electricity; water isn't free). Drought-tolerant plant selection helps, but it limits biodiversity somewhat. There's always a trade-off. Social and Wellness Benefits Beyond purely environmental or economic considerations, green roofs affect people's daily experiences. These softer benefits are harder to measure but genuinely matter. Intensive roofs create usable outdoor space in areas where ground-level gardens might not exist. For urban dwellers, having accessible green space improves quality of life. Research consistently shows that access to nature, even in small doses, reduces stress, improves mood, and supports mental health. Office workers with views of green roofs report higher satisfaction than those overlooking barren rooftops or city streets. The aesthetic improvement isn't trivial; it affects how people feel about spaces they occupy daily. Green roofs also provide sound insulation. Soil and vegetation absorb sound more effectively than hard roofing materials. For buildings near flight paths or busy roads, this acoustic buffering offers real value. Community rooftop gardens create social spaces where none existed before. People gather, interact, and perhaps grow food. These social benefits are difficult to quantify in monetary terms but contribute meaningfully to urban livability. Technical Considerations: Making Green Roofs Work Successfully implementing a green roof requires attention to several technical details. Get these wrong, and you'll face problems regardless of how good the concept seems. Waterproofing Integrity The waterproofing layer sits beneath everything else: soil, plants, drainage systems. If it fails, fixing it means removing and replacing the entire green roof assembly. This is expensive and disruptive. Root-resistant membranes are essential. Plant roots seeking water and nutrients will exploit any weakness in standard membranes. Specialised materials prevent root penetration while maintaining waterproofing integrity. Regular inspections help, but access can be challenging once the system is established. Prevention through proper specification beats attempted cure. Drainage Design Proper drainage might be the single most critical factor in green roof success. Inadequate drainage leads to waterlogging, plant death, and potential structural damage. The drainage layer must handle peak water volumes during heavy rainfall whilst retaining enough moisture for plant health during dry periods. It's a balancing act requiring careful design. Drainage outlets need protection from blockages. Leaves, debris, and growing media can clog systems if not properly filtered and maintained. Plant Selection Not all plants thrive on roofs. The environment is harsh, exposed to wind, temperature extremes, limited soil depth, and variable water availability. Suitable plants depend on system depth. Extensive roofs generally use sedum, certain grasses, and other succulents. Intensive systems allow broader choices, but plants still need to tolerate rooftop conditions. Native species offer biodiversity benefits but may require more water than drought-tolerant alternatives. Climate change adds another variable; selecting plants that can handle both current conditions and projected future conditions makes sense. When Green Roofs Make Most Sense Green roofs aren't universally appropriate, but they work brilliantly in certain contexts. New commercial buildings with flat roofs are ideal candidates. The structure can incorporate necessary load capacity from the design stage, and the scale often justifies investment. Buildings pursuing environmental certifications gain additional incentives. Urban developments with limited ground-level green space benefit significantly. If you can't have gardens at street level, put them on roofs. Buildings in flood-prone areas gain measurable stormwater management benefits that can reduce flood risk and insurance costs. Projects prioritising sustainability find that green roofs align well with broader environmental goals. They're visible demonstrations of commitment that resonate with environmentally conscious tenants or buyers. Conversely, green roofs make less sense for: Buildings with structural limitations that can't support additional weight Severely sloped roofs (though some systems work on moderate pitches) Very small roof areas where costs don't justify benefits Properties with extremely limited budgets are unable to absorb higher installation costs Regulatory and Planning Factors Some local authorities in Ireland and across Europe actively encourage or even mandate green roofs in certain circumstances. Understanding the regulatory context helps with project planning. Building regulations may require additional stormwater management measures in new developments. Green roofs can contribute to meeting these requirements whilst providing co-benefits. Some areas offer grants or incentives for green roof installation, improving economic viability. These change over time, so checking current programmes makes sense during planning stages. Planning permissions for roof alterations may be needed, depending on the building and proposed changes. Early consultation with planning authorities prevents later complications. Frequently Asked Questions How much maintenance do green roofs require, and what does it involve? Maintenance needs vary substantially by system type. Extensive green roofs with sedum require minimal intervention, typically 1-2 annual visits for inspection, weeding, and clearing drainage outlets. Semi-intensive systems need quarterly attention,n including occasional watering, fertilising, and more thorough weeding. Intensive rooftop gardens demand regular care similar to ground-level gardens: seasonal watering (potentially weekly during dry spells), pruning, replanting, and general horticultural maintenance. All systems benefit from twice-yearly professional inspections focusing on drainage function, membrane integrity, and vegetation health. Budget £500-2,000 annually for extensive systems, £2,000-5,000 for intensive gardens. Can existing buildings support green roofs, or do they only work on new construction? Many existing buildings can support green roofs, but structural assessment is essential before proceeding. The building's load-bearing capacity must accommodate the additional weight. Extensive systems add 60-150 kg/m² when saturated, whilst intensive systems can exceed 300-500 kg/m². Modern buildings with concrete construction often have adequate capacity, particularly if designed with roof terrace potential. Older structures with timber or steel frames may require reinforcement or might only accommodate lighter, extensive systems. A structural engineer should evaluate feasibility before detailed planning begins. Retrofits are absolutely possible, but typically cost more than incorporating green roofs into new builds. Do green roofs actually save money despite higher installation costs? Green roofs generate savings through multiple channels that accumulate over their lifespan. Energy cost reductions of 10-30% result from improved insulation and reduced heating/cooling demands. Waterproofing membrane lifespan doubles or triples (from 20-25 years to 40-50+ years), avoiding one or two complete re-roofing projects. Stormwater management capacity may reduce drainage infrastructure requirements or flood insurance premiums. Property values often increase 5-15% due to aesthetic appeal and demonstrated sustainability commitment. Initial costs run 50-200% higher than conventional roofing, but lifecycle analysis over 40 years frequently shows net positive returns, particularly for commercial properties and in urban areas with high property values. What happens to green roofs during winter, and do plants die back? Green roofs experience seasonal cycles like ground-level gardens, though rooftop exposure intensifies conditions. Properly selected plants survive Irish winters without issues, sedums and many grasses enter dormancy but remain alive, often browning duringthe coldest months before regenerating in spring. The growing medium provides insulation, protecting plant roots from severe freezing. Snow coverage actually benefits many green roof plants by insulating them further. Winter maintenance remains important: clearing heavy snow loads that exceed design specifications, checking that drains remain clear of ice, and inspecting for wind damage after storms. Native Irish plant species naturally handle local winter conditions well. Tender plants requiring protection aren't suitable for extensive systems. Are green roofs environmentally beneficial enough to justify the resources used in installation? Lifecycle environmental analyses consistently demonstrate positive net environmental impact for green roofs in urban contexts. Manufacturing and installing green roof components (membranes, growing medium, plants) requires resources and energy, but operational benefits outweigh these initial inputs within 5-10 years. Carbon sequestration in plants and soil, reduced building energy consumption, improved stormwater quality, urban heat island mitigation, and biodiversity habitat creation all contribute ongoing environmental value for 40+ years. One square metre of extensive green roof sequesters approximately 375g of CO₂ annually whilst reducing stormwater runoff by 50-75%. Environmental payback accelerates in high-density areas where heat island effects are pronounced, and ground-level green space is scarce. Explore Green Roofing Solutions with QBM Green roofs offer compelling benefits, such as stormwater management, energy efficiency, extended roof lifespan, and environmental improvements. They also present real challenges around costs, weight, and ongoing maintenance that deserve careful consideration. The decision to install a green roof should account for your specific building, budget, and goals. For projects where conditions align well, green roofs deliver measurable value across environmental, economic, and social dimensions. Where constraints exist, structural limitations, budget restrictions, and maintenance capacity, conventional roofing might remain the better choice. At QBM, we supply green roofing systems throughout Ireland to contractors and builders working on both commercial and residential projects. Our range includes everything needed for complete installations: waterproofing membranes, drainage layers, growing medium, and vegetation options suited to Irish conditions. If you're planning a green roof project or exploring whether one suits your building, our team can provide technical guidance on system selection and specification. Visit QBM's green roofing systems page to browse our product range or contact us directly to discuss your project requirements. We're here to help you source the right materials for successful green roof installation.
- Understanding Green Roofs: How These Living Systems Actually Function
You've probably seen a green roof, perhaps on a bus shelter, maybe atop a modern office building, or even featured in architectural magazines. But understanding how green roofs work involves more than just acknowledging that plants grow on buildings. There's a surprising amount of engineering, biology, and careful planning involved in creating a roofing surface that allows vegetation to thrive whilst simultaneously protecting the structure beneath. This isn't just about aesthetics, though visual appeal certainly plays a role. Green roof systems function as complex, multi-layer solutions that manage water, regulate heat, filter air, and create habitat. Each layer serves a specific purpose, and when these components work together properly, they form what's essentially a complete ecosystem several stories above ground level. Let's walk through exactly how these systems operate, layer by layer, function by function. The Basic Concept Behind Green Roofs At its most fundamental level, a green roof transforms an otherwise unused, often heat-absorbing surface into a living, functioning layer. Traditional roofs shed water immediately; rain hits the surface and runs straight into drains. They also absorb solar radiation, heat up dramatically, and offer nothing to the surrounding environment beyond weather protection for the building below. Green roofs flip this script entirely. Instead of shedding water, they retain it. Rather than absorbing maximum heat, they moderate the temperature. Where conventional roofs offer zero biodiversity value, green roofs create habitat. The multi-layered approach makes this possible. Think of it as stacking functions. Each component, from the waterproofing membrane at the bottom to the plants on top, contributes something specific. Together, they create benefits that exceed what any single element could achieve alone. Breaking Down the Layer System Perhaps the best way to understand how these roofing systems function is by examining them from bottom to top. Each layer has a job. Some provide protection, others manage water, and still others support plant life. The Structural Foundation Everything starts with the building's roof deck, typically concrete or steel. This foundation must be strong enough to handle the additional weight. Green roofs aren't light. Even extensive systems add 60-150 kg per square metre when saturated. Intensive green roofs with deeper soil and larger plants can exceed 300-500 kg per square metre. The structural capacity determines what type of green roof system becomes feasible. Older buildings sometimes struggle with this requirement, whilst newer construction can incorporate the necessary load-bearing capacity from the design stage. Waterproofing: The Critical Protection Layer Here's where things get interesting and critical. A waterproofing membrane forms the first line of defence against the very element the system is designed to retain: water. This might seem contradictory, but it's absolutely essential. Water retention happens above this membrane. Below it, the building must remain completely dry. Root-resistant waterproofing membranes prevent plant roots from penetrating through to the structure. Roots seeking moisture and nutrients can be remarkably persistent, so standard roofing membranes won't suffice. Materials like TPO, PVC, or EPDM with root-resistant properties are common choices. These membranes need to withstand constant moisture exposure whilst maintaining complete watertight integrity for decades. Quality matters enormously here; failure at this layer means removing and replacing the entire green roof assembly to make repairs. Insulation and Vapour Control Thermal insulation sits beneath or sometimes above the waterproofing membrane, depending on the system design. This layer improves the building's energy efficiency by reducing heat transfer. In Ireland's climate, this means less heat loss in winter and reduced solar heat gain during summer. Vapour control layers manage moisture movement between the building interior and the roof assembly. They prevent condensation issues that could damage insulation or the structural deck over time. The Water Management Layers Managing water correctly sits at the heart of green roof functionality. Too much water and plants drown; too little and they die. The drainage and filter layers handle this balance. Drainage Layer Function Drainage layers serve dual purposes. They must allow excess water to drain away whilst simultaneously retaining enough moisture to sustain plant growth between rainfall events. This delicate balance requires careful engineering. Modern drainage boards often feature cellular structures, think egg cartons with peaks and valleys. Water collects in the valleys, providing a reserve for plants, whilst peaks support the growing medium above. Excess water flows through the roof outlets, preventing waterlogging. Some systems employ drainage mats made from synthetic materials, whilst others use aggregate layers. The choice depends on weight considerations, cost, and performance requirements. Filter Fabric: The Unsung Hero Filter sheets might seem like minor components, but they're crucial. Positioned between the drainage layer and growing medium, they prevent fine particles from washing down and clogging drainage paths. Without proper filtering, sediment would gradually block the drainage capacity. Water would pool, plants would suffer, and the system's stormwater management benefits would diminish. It's a simple layer with enormous importance. The Growing Medium: Not Just Dirt Call it soil if you like, but the growing medium in green roof systems bears little resemblance to garden earth. This engineered substrate balances conflicting requirements: it must be light enough not to overload the structure, porous enough to drain freely, yet capable of retaining sufficient moisture and nutrients for plant health. Typical compositions include lightweight aggregates like expanded clay, pumice, or perlite mixed with organic materials. The ratio varies based on plant selection and climate. Some systems include water-retention polymers that absorb and slowly release moisture. Depth matters significantly here. Extensive green roofs typically use 5-15cm of growing medium, enough for sedum, mosses, and hardy grasses. Intensive systems employ 15-60cm or more, supporting diverse plantings including shrubs and small trees. Semi-extensive systems fall somewhere between, offering more planting variety than extensive roofs whilst weighing less than full intensive installations. Green Roof Type Growing Medium Depth Typical Vegetation Weight (saturated) Maintenance Needs Extensive 5-15cm Sedum, mosses, grasses 60-150 kg/m² Minimal (1-2 visits yearly) Semi-Extensive 15-30cm Herbs, perennials, grasses 150-250 kg/m² Moderate (quarterly checks) Intensive 30-60cm+ Shrubs, perennials, small trees 250-500+ kg/m² Regular (similar to ground gardens) The Vegetation: Making It All Come Alive Plants are what make green roofs "green," obviously. But plant selection involves more than aesthetics. The roof environment is harsh, exposed to wind, temperature extremes, limited soil depth, and variable water availability. Successful green roof plants share certain characteristics. They tolerate drought, handle waterlogging during heavy rain, survive temperature fluctuations, and cope with shallow root zones. Not every plant manages this combination. Sedum Roof Dominance Sedum varieties dominate extensive systems for good reasons. These succulent plants store water in their leaves, allowing them to survive dry periods. Their shallow roots work well in thin growing media. They spread to cover bare patches, reducing erosion. Many species offer visual interest through colour changes across seasons. A sedum roof might include 4-8 different species, providing redundancy; if one struggles in particular conditions, others fill gaps. This biodiversity approach improves resilience. Diverse Plantings for Intensive Systems Intensive green roofs, sometimes called roof gardens, support much broader plant palettes. Grasses, perennials, herbs, and even vegetables can thrive with adequate soil depth and maintenance. These systems often include hard landscaping, paths, seating areas, and perhaps water features. The trade-off? Significantly higher weight, increased cost, and substantial ongoing maintenance. But for buildings where roof access creates valuable amenity space, the investment makes sense. How Water Moves Through the System Understanding water flow explains much about green roof functionality. When rain falls, several things happen simultaneously. Plants intercept some water on leaf surfaces. This moisture evaporates quickly, never entering the growing medium. It's the first line of stormwater retention. Water that reaches the soil gets absorbed into the growing medium. The substrate acts like a sponge, holding moisture available to plant roots. Depending on how dry the system is, this layer might absorb 40-75% of rainfall during moderate events. Excess water, more than the growing medium can hold, percolates down to the drainage layer. Here, it has two options: immediate drainage to roof outlets or temporary retention in the drainage board's reservoir sections. Pl ants can access this stored water through capillary action, drawing moisture upward as the growing medium dries. The whole process slows water movement dramatically compared to conventional roofs. Instead of instant runoff, water release happens gradually over hours or days. This stormwater management benefit reduces peak loads on drainage infrastructure. The Role of Evapotranspiration Here's a term you'll encounter often when discussing how green roofs work: evapotranspiration. It's creating a cooling effect through combined evaporation and plant transpiration. Plants absorb water through their roots, transport it through their vascular systems, and release it as water vapour through leaf pores (stomata). This process, transpiration, uses heat energy from the surrounding air, creating a cooling effect. Think of it as the plant equivalent of sweating. Simultaneously, moisture evaporates from soil surfaces and wet leaf areas. Combined, these processes remove substantial heat from the roof surface and surrounding air. Research shows evapotranspiration can reduce roof surface temperatures by 20-30°C compared to conventional dark roofing. This cooling effect reduces the building's cooling load and helps address urban heat island effects in cities. The rate of evapotranspiration depends on several factors: plant density, available moisture, temperature, humidity, and sunlight. During hot, dry periods with adequate water availability, the process accelerates. When water becomes scarce or temperatures drop, it slows. Temperature Regulation and Energy Benefits Green roofs moderate building temperature through multiple mechanisms, not just evapotranspiration. The growing medium provides insulation; soil has fairly poor thermal conductivity, which actually helps in this application. During summer, the vegetation shades the roof surface. Rather than solar radiation heating the waterproofing membrane directly, plants absorb and use that energy for photosynthesis. Evapotranspiration provides additional cooling. The result? Dramatic reduction in heat transfer to the building interior. Winter brings different dynamics. The growing medium and vegetation create an insulating blanket that reduces heat loss from the building. Snow coverage, when it occurs, adds another insulating layer. Studies show green roofs can reduce cooling energy consumption by 20-50% and heating costs by 10-30%, though actual savings vary based on climate, building design, and existing insulation levels. For commercial buildings with large roof areas relative to total floor space, these savings become quite significant. Air Quality Improvements Through Filtering Another function worth understanding: green roofs improve air quality through both passive and active mechanisms. Plants act as natural filters, absorbing airborne particles and pollutants. Dust, particulate matter, and various atmospheric pollutants settle on leaf surfaces or get absorbed through stomata during photosynthesis. Rainfall washes some material into the growing medium, where it gets broken down by microorganisms. Plants also absorb carbon dioxide and release oxygen through photosynthesis. Whilst a single green roof won't transform urban air quality, collective implementation across a city creates measurable improvements. Some research suggests green roofs can reduce atmospheric pollutants by 10-20% in their immediate vicinity. The filtering process isn't perfect; plants have limits to what they can absorb. But in urban environments where air quality often struggles, every bit helps. Noise Reduction Properties Sound insulation isn't the primary driver for green roof installation, but it's a genuine benefit. The multi-layer system, particularly the growing medium and vegetation, absorbs and deflects sound waves. Studies indicate green roofs can reduce exterior noise by 40-50 decibels. For buildings near airports, busy roads, or industrial areas, this acoustic buffering improves interior comfort noticeably. The effect works both ways. Sound generated inside the building gets partially absorbed rather than reflecting off hard roofing surfaces. Mechanical equipment on rooftops becomes less intrusive to neighbours when buffered by green roof vegetation. Creating Habitat Value Green roofs function as small ecosystems, providing habitat where little existed before. Birds, insects, and other small creatures colonise these spaces, particularly when native plants are included in the planting palette. For pollinators, bees, butterflies, and other beneficial insects, green roofs offer food sources and nesting sites. In urban areas where development has eliminated ground-level habitat, rooftop spaces become surprisingly important stepping stones for species movement. The biodiversity value increases with green roof maturity. Over time, additional species arrive naturally, enriching the plant community beyond what was originally installed. This ecological development continues for years, creating increasingly complex small-scale habitats. System Maintenance Requirements Understanding ongoing maintenance helps explain long-term system functionality. Unlike conventional roofs that require minimal attention until they need replacement, green roofs demand periodic care. Extensive systems need the least intervention, typically two annual inspections focusing on: Checking drainage outlets for blockages Removing unwanted woody vegetation Assessing plant coverage and health Inspecting for damage after severe weather Applying slow-release fertiliser if needed Intensive roof gardens require regular maintenance similar to ground-level landscapes. This includes watering during dry periods (irrigation systems help), seasonal pruning, replanting as needed, and general horticultural care. Properly maintained systems reliably perform their functions for decades. Neglected ones deteriorate, losing both aesthetic and functional benefits. The maintenance commitment should factor into initial decision-making about green roof installation. When Irrigation Becomes Necessary Here's something that surprises people: despite retaining rainwater, green roofs sometimes need supplemental irrigation. During prolonged dry periods, particularly on extensive systems with shallow growing medium, drought stress can damage vegetation. Ireland's climate usually provides adequate rainfall, but dry summers do occur. Intensive systems with diverse plantings are particularly vulnerable during extended drought. Irrigation systems, drip lines, or spray heads on timers, prevent plant loss during these periods. The irrigation requirement depends on growing medium depth, plant selection, and local rainfall patterns. Drought-tolerant species like sedum reduce irrigation needs significantly. Native plants adapted to local conditions generally perform better than exotics during challenging weather. Some argue that irrigation undermines the sustainability benefits of green roofs by employing electricity (for pumps) and consuming water. This criticism has merit, which is why proper plant selection and adequate growing medium depth matter. Systems designed to minimise irrigation dependencies perform better environmentally. Interaction with Building Systems Green roofs don't exist in isolation; they interact with other building systems in interesting ways. The cooling effect at the roof surface can reduce the temperature of air entering HVAC equipment intake vents, improving efficiency. Rainwater collected from green roofs tends to be cleaner than runoff from conventional roofs, though it's not potable without treatment. Some buildings integrate green roofs with rainwater harvesting systems, creating additional water management benefits. For buildings pursuing environmental certifications like LEED or BREEAM, green roofs contribute to multiple credit categories: stormwater management, heat island reduction, biodiversity enhancement, and sometimes energy performance. Frequently Asked Questions What happens to green roofs during winter, and do they continue functioning? Green roofs remain functional throughout winter, though their activity levels change seasonally. Many plants enter dormancy, reducing evapotranspiration and visible growth. Sedum often browns during cold months but remains alive, regenerating when temperatures warm. The growing medium continues insulating the building, actually providing better thermal resistance when frozen. Drainage must continue functioning to prevent ice formation that could damage membranes. Snow coverage provides additional insulation whilst slowly releasing meltwater rather than creating immediate runoff. Most green roof benefits persist year-round, though stormwater retention and cooling effects naturally peak during the growing season. How do green roofs handle very heavy rainfall without flooding the building? Green roofs manage extreme rainfall through layered redundancy in their design. The growing medium absorbs initial rainfall up to its saturation point (typically 40-75% of moderate rain events). Once saturated, excess water moves to the drainage layer, which channels it toward roof outlets whilst temporarily storing some in reservoir cells. Properly designed systems always include overflow provisions, additional drains, scuppers, or weirs that activate when water levels exceed normal capacity. These emergency outlets prevent water from pooling above design depths. The system essentially works like a bathtub with both a regular drain and an overflow drain higher up. Critical installations sometimes include multiple waterproofing layers for redundancy. Can green roofs reduce heating costs as well as cooling costs? Yes, green roofs provide measurable heating cost reductions, though typically less dramatic than summer cooling savings. The insulating properties of the growing medium (10-60cm thick, depending on system type) reduce heat loss through the roof. Studies show a 10-30% reduction in winter heating demands, with actual savings depending on existing insulation levels, building design, and climate. Buildings with minimal existing roof insulation see greater improvements. The effect works through thermal mass, soil heats and cools slowly, buffering temperature fluctuations, and resistance to heat flow. Snow accumulation creates additional temporary insulation. Combined with standard roof insulation beneath the waterproofing membrane, green roofs contribute meaningfully to year-round energy efficiency. Do green roofs require complete replacement periodically, like conventional roofs? Green roofs actually extend waterproofing membrane lifespan significantly, often doubling or tripling it from 20-25 years to 40-50+ years. The vegetation and growing medium shield membranes from UV radiation (the primary cause of conventional roof deterioration), moderate temperature extremes, and prevent mechanical damage. However, other components need periodic attention: growing medium may require replenishment every 20-30 years as organic content breaks down; plants need replacement if coverage declines; drainage components occasionally need cleaning or replacement. The waterproofing membrane itself, when properly protected, can last the building's lifetime. This extended lifespan offsets higher initial installation costs through avoided replacement expenses. How much water weight does a green roof add to a building structure? Water weight varies dramatically based on saturation level and system type, making this a critical structural engineering consideration. When fully saturated after heavy rainfall, extensive green roofs (5-15cm growing medium) add approximately 60-150 kg per square metre. Semi-intensive systems (15-30cm medium) reach 150-250 kg/m², whilst intensive installations (30-60cm+ medium) can exceed 250-500 kg/m² or more. Design calculations must account for maximum saturation scenarios, not average conditions. Growing medium depth has the largest influence on weight; each centimetre of saturated substrate adds roughly 10-16 kg/m². Structural assessments should always precede green roof installation, particularly on existing buildings. Some older structures simply cannot accommodate the additional load without expensive reinforcement. Source Quality Green Roofing Materials from QBM Green roofs function through careful integration of multiple engineered layers, each serving specific purposes whilst working together as a complete roofing system. From waterproofing protection to drainage management, from growing medium selection to plant choice, every component contributes to overall performance. Understanding these mechanisms helps explain why properly designed green roof systems deliver such significant benefits, such as stormwater retention, temperature regulation, energy savings, habitat creation, and improved urban environments. The complexity might seem daunting, but that's where working with experienced suppliers and installers makes the difference. At QBM, we supply complete green roofing systems throughout Ireland, providing all the essential components contractors need for successful installations. Our range includes waterproofing membranes, drainage solutions, growing medium products, and vegetation options suitable for Irish climate conditions. Whether you're planning an extensive sedum roof or a more complex intensive green roof system, having access to compatible, quality materials ensures projects achieve their intended performance. Visit QBM's green roofing systems page to explore our product offerings, or contact our team to discuss specific project requirements and material specifications. We're here to help you source everything needed for effective green roof construction.
- Weighing Metal Roofing: Advantages and Drawbacks Worth Considering
Choosing roofing materials for your property isn't exactly a decision you make lightly. It's one of those investments that sits atop your building for decades, protecting everything beneath it whilst facing whatever weather Ireland throws its way. Metal roofing is becoming increasingly popular with homeowners across Ireland and beyond, but is it the right choice for your project? The pros and cons of metal roofing deserve careful consideration before you commit. These systems offer genuine benefits, exceptional longevity, impressive weather resistance, and solid energy efficiency. But they also come with challenges that might make you think twice. Let's walk through what metal roofing is actually like in practice, beyond the marketing claims. This isn't about declaring metal roofs either brilliant or terrible. They're neither. Rather, they occupy a specific niche where their strengths align with certain building requirements, whilst their limitations rule them out for others. Understanding where they fit helps you make smarter decisions about whether metal belongs on your roof. What Metal Roofing Actually Involves Metal roofing systems use panels, sheets, or shingles manufactured from various metals, typically steel, aluminium, zinc, or copper. These materials get shaped into profiles ranging from standing seam panels with concealed fasteners to metal shingle designs that mimic traditional slate or tile appearances. Installation methods vary depending on the product type. Standing seam systems feature interlocking panels running vertically up the roof slope, creating clean lines and weather-tight seams. Corrugated roof sheets overlap in a simpler pattern, often seen on agricultural buildings but also used residentially. Metal shingle products install more like conventional roofing materials, though they still require specialised knowledge. The roofing metal itself comes with protective coatings, galvanised layers, paint finishes, or specialised treatments that resist corrosion and extend lifespan. Quality varies enormously across products. Premium metal roofs include multiple protective layers, whilst budget options might skimp on crucial weatherproofing treatments. Understanding these basics matters because "metal roof" isn't a single thing. It's a category encompassing vastly different products with distinct characteristics, costs, and performance profiles. Exceptional Longevity That Outlasts Alternatives Perhaps the most compelling advantage of metal roofing is longevity. These systems last 40-70 years when properly installed and maintained, sometimes longer with premium materials like copper, which can exceed 100 years. Compare that to traditional asphalt shingles, which typically need replacement after 15-25 years. The mathematics work in metal's favour over a building's lifetime. You might replace asphalt roofing three or four times during the span a single metal roof performs adequately. This extended lifespan delivers real benefits beyond just avoiding replacement projects: Reduced waste going to landfills Fewer disruptions to building occupants Lower lifetime costs when installation expenses are spread across decades Less frequent need for scaffolding or roof access equipment Decreased environmental impact from manufacturing and transport The longevity advantage assumes proper installation, though. Poor workmanship can compromise even the best materials. Fasteners installed incorrectly, inadequate flashing around penetrations, or thermal movement not properly accommodated; these issues undermine durability regardless of metal quality. Superior Weather Resistance in Harsh Conditions Metal roofs excel at protecting buildings from weather extremes. They handle conditions that damage or destroy other roofing materials, making them particularly valuable in exposed locations or areas prone to severe weather. Wind Performance: Metal roofing systems, particularly standing seam installations with concealed fasteners, resist wind uplift exceptionally well. They can withstand gusts up to 140 mph when properly installed. Ireland's coastal regions and elevated sites see strong winds regularly; metal roofing handles these conditions far better than many alternatives. Impact Resistance: Hail and falling debris pose threats to roofing. Metal roofs typically earn Class 4 impact resistance ratings, the highest available. They can withstand hail up to 2 inches in diameter without penetrating damage, though softer metals like aluminium may dent. Water Shedding: The non-porous nature of metal means water can't penetrate the material itself. Properly installed systems with appropriate slopes shed rain and melting snow efficiently, reducing moisture-related problems. Seamless panels minimise leak potential compared to roofs with thousands of individual components. Fire Resistance: Metal roofing is non-combustible, earning top fire-resistance ratings. This characteristic provides valuable protection in areas prone to wildfires or where building codes mandate fire-resistant construction. These weather resistance characteristics translate into lower insurance premiums in many cases. Insurance providers recognise reduced risk, offering discounts that partially offset higher initial costs. Energy Efficiency Metal Roofing Delivers Energy efficiency represents another significant advantage. Metal roofs reflect solar radiation rather than absorbing it, reducing heat transfer into buildings during warm weather. This reflective property, particularly with light-coloured or specially coated metal, can lower cooling costs by 10-25%. The efficiency of metal roofs works through several mechanisms: Reflective coatings on metal surfaces bounce solar energy back rather than converting it to heat. This keeps roof surface temperatures significantly lower than dark asphalt shingles, which can exceed 80°C on hot days. Metal roofs might reach only 35-40°C under identical conditions. Thermal emissivity allows metal to release absorbed heat quickly once sun exposure ends. Evening cooling happens faster, reducing overnight heat transfer into the building. In Ireland's climate, winter heat retention matters too. Some metal roofing systems include integrated insulation or dead air spaces that reduce heat loss, though this varies by product. The energy benefits work year-round, not just during summer. That said, the energy savings depend heavily on proper installation. Ventilation beneath metal roofing prevents heat buildup. Inadequate ventilation negates potential benefits whilst creating condensation problems. Low Maintenance Requirements Over Decades Once installed, metal roofs require minimal ongoing maintenance compared to other materials. This low-maintenance characteristic appeals to property owners wanting to minimise long-term costs and effort. Regular maintenance typically involves: Annual inspections to check fasteners, flashing, and sealants Clearing debris from valleys and guttering to prevent water backup Removing moss or algae growth in shaded areas Checking for and addressing any loose or damaged panels These tasks take far less time than maintaining asphalt shingle roofs, which need more frequent inspection and repair. Metal roofs don't suffer the gradual deterioration, curling, cracking, and granule loss that plagues shingles. The maintenance simplicity does have limits. When repair becomes necessary, it often requires specialised knowledge. Finding contractors experienced with your specific metal roofing system may prove challenging in some areas. Roof repair costs can run higher than fixing traditional materials. Aesthetic Diversity in Modern Metal Products Metal roofing has come remarkably far from the utilitarian corrugated sheets associated with industrial buildings. Contemporary metal roof products offer substantial aesthetic diversity, allowing integration with virtually any architectural style. Available profiles include: Standing seam panels create a sleek, modern appearance Metal shingle products mimicking slate, tile, or wood shake Corrugated or ribbed patterns suited to agricultural or industrial aesthetics Stone-coated metal tiles combine metal durability with traditional looks Colour options span the spectrum. Factory-applied finishes come in dozens of standard colours, with custom matching available for premium products. These finishes resist fading far better than painted surfaces, maintaining appearance for decades. The design flexibility lets metal roofing work on: Contemporary homes seeking clean, minimalist aesthetics Traditional properties where metal shingles replicate historic materials Commercial buildings require both performance and visual appeal Agricultural structures balancing cost with weather protection This aesthetic diversity addresses one historical objection to metal roofing, that it looked too industrial or commercial for residential use. Modern products eliminate this concern entirely. The Cost Reality: Higher Initial Investment Here's where metal roofing loses ground: initial cost. Installing metal roofs typically costs 2-3 times more than asphalt shingles, sometimes more for premium metals or complex installations. Material costs alone run higher. Quality metal roofing sheets or panels cost more to manufacture than asphalt products. Add specialised fasteners, trim pieces, and flashing components, and materials expenses mount quickly. Installation labour increases costs further. Metal roofing installation demands specialised skills and experience. Contractors need proper training, tools, and knowledge of thermal movement, fastener placement, and weatherproofing details. This expertise commands higher rates than general roofing services. A typical breakdown might show: Cost Component Asphalt Shingles Metal Roofing Materials £40-60 per m² £80-150 per m² Labour £30-45 per m² £55-90 per m² Total Installed £70-105 per m² £135-240 per m² Expected Lifespan 15-25 years 40-70 years Cost Per Year £3-7 per m² £2-6 per m² The lifetime cost comparison favours metal, but that requires upfront capital that many homeowners struggle to access. Financing costs can erode long-term savings if you're borrowing money for installation. Noise Concerns During Heavy Rain Metal roofs can be noisy; there's no point pretending otherwise. Heavy rain creates drumming sounds. Hail produces sharp pinging. For some people, this becomes a significant drawback. The noise level depends on several factors: Roof Construction: Solid decking with proper insulation underneath dramatically reduces noise transmission. Metal installed over spaced battens with minimal insulation amplifies sound considerably. The substrate matters enormously. Metal Thickness and Profile: Thicker metal panels resonate less than thin sheets. Standing seam profiles behave differently from corrugated patterns. Stone-coated metal tiles absorb sound better than bare metal. Building Design: Cathedral ceilings with exposed roof structures transmit more noise than insulated attic spaces. Living areas directly beneath roofs hear more than rooms separated by multiple floors. Proper installation with adequate insulation typically reduces noise to acceptable levels. Many homeowners actually enjoy the sound of rain on metal; it creates a soothing ambiance that some find pleasant. But if noise sensitivity concerns you, this characteristic deserves consideration before committing to metal. Thermal Movement and Fastener Issues Metal expands when heated and contracts when cooled. This thermal movement, whilst natural, creates challenges for roofing systems that must remain watertight across temperature ranges. Quality metal roofing systems account for movement through: Fasteners designed to allow metal expansion without loosening Panel designs incorporating movement allowances Proper installation techniques that don't over-tighten or constrain panels Adequate spacing and expansion joints where needed When installers ignore thermal movement, problems develop: Fasteners work loose over repeated heating/cooling cycles, creating leak points and potential panel displacement during high winds. Panels buckle or "oil-can" (develop visible waves) when constrained improperly. Seams open up, compromising weather resistance. These issues stem primarily from poor installation rather than inherent material problems. Experienced contractors familiar with metal roofing systems avoid these pitfalls. Unfortunately, not all roofers possess the necessary expertise, making contractor selection crucial. The risk underscores why proper installation matters so much with metal. A perfectly manufactured product installed incorrectly performs worse than mediocre materials installed properly. Denting and Damage Vulnerability Whilst metal roofs resist most impacts well, they're not indestructible. Certain metals dent more easily than others, and all metals can be damaged by sufficient force. Soft Metals: Aluminium and copper are relatively soft, making them susceptible to denting from large hail, falling branches, or foot traffic during maintenance. These dents rarely cause leaks but can look unsightly. Harder Metals: Steel roofs, particularly those made from thicker gauge material, resist denting far better. They handle impacts that would destroy shingles whilst showing minimal damage themselves. Repair complexity varies. Small dents might be cosmetically annoying but functionally irrelevant. Larger damage potentially requires panel replacement, which can prove difficult if matching materials aren't readily available. Some metal roofing products use discontinued profiles or colours, making future repair challenging. Walking on metal roofs also requires care. Improper foot traffic can dent panels or damage protective coatings. Maintenance work needs proper planning and technique to avoid harming the roof during servicing. Compatibility with Roof Pitch and Design Metal roofing works brilliantly on some roof configurations, whilst struggling on others. Understanding these limitations prevents expensive mistakes. Ideal Applications Steeper-pitched roofs (4:12 slope or greater) where water sheds quickly Simple rectangular designs without numerous valleys or penetrations Large unbroken roof planes where panels can run full length Buildings where modern aesthetics complement the structure Challenging Applications Very low-slope roofs require special waterproofing details Complex roof shapes with multiple valleys, dormers, and direction changes Historic buildings where metal might look inappropriate Situations requiring frequent roof access for equipment maintenance Installation complexity increases dramatically with roof complexity. Each valley, ridge, hip, or wall intersection requires careful flashing and sealing. Costs escalate accordingly. Some metal roofing systems handle complexity better than others. Standing seam panels offer more flexibility than rigid sheets. Metal shingles adapt to complicated roof shapes more easily than long panels. Matching product to application matters enormously. Frequently Asked Questions Does metal roofing increase property value and provide a good return on investment? Metal roofing typically increases property value, though the exact amount varies by location and local market preferences. Most estate agents consider metal roofs an upgrade over standard asphalt shingles. The improvement in value stems from longevity, reduced maintenance, and energy efficiency. Return on investment studies suggest homeowners recoup 60-85% of installation costs upon resale, with higher percentages in areas where metal roofing is common. The extended lifespan means future owners won't face near-term replacement costs, making properties more attractive. Insurance discounts and energy savings provide ongoing returns throughout ownership. Can metal roofs be installed directly over existing shingles, or must they be removed first? Whilst metal roofing can sometimes be installed over one layer of existing shingles, most roofing professionals recommend complete removal. Installing over shingles saves labour costs but creates potential problems. Trapped moisture between layers can cause rot in the roof decking. The uneven surface makes achieving proper metal roof installation difficult. You lose the opportunity to inspect and repair deck damage. Building codes in many areas limit overlay installations. Most manufacturers void warranties when metal goes over existing roofing. The short-term cost savings rarely justify long-term risks. Proper installation on clean decking ensures maximum performance and longevity. How does metal roofing perform in coastal environments with high salt exposure? Coastal locations present special challenges for metal roofing due to salt spray, causing accelerated corrosion. Material selection becomes critical. Aluminium performs exceptionally well in marine environments, naturally resisting salt corrosion. Galvanised steel requires additional protective coatings for coastal use; bare or poorly coated steel corrodes quickly. Copper and zinc develop protective patinas that resist salt damage well. Regular washing to remove salt deposits extends lifespan regardless of metal type. Quality fasteners made from compatible metals prevent galvanic corrosion. Properly specified and maintained metal roofing excels in coastal settings, but cheap or inappropriate materials fail rapidly. What warranty coverage should homeowners expect from quality metal roofing products? Quality metal roofing typically includes two types of warranties: material warranties from manufacturers covering paint finish and substrate integrity, and workmanship warranties from installers covering proper installation. Material warranties usually range from 30 to 50 years for finish and may include lifetime guarantees on the metal itself. These cover fading, chipping, and peeling of factory-applied finishes. Substrate warranties protect against rust-through or structural failure. Installation warranties typically run 10-25 years, covering leaks and installation defects. Read warranty terms carefully; many include exclusions for coastal exposure, foot traffic damage, or inadequate maintenance. Transferability to future homeowners varies by manufacturer. Are metal roofs more difficult to install solar panels on compared to traditional roofing? Metal roofs actually work exceptionally well with solar panel installations, often easier than asphalt shingles. Standing seam metal roofs particularly simplify solar mounting through clamp systems that attach directly to seams without penetrating the roof surface. This eliminates leak risks associated with mounting brackets. The long lifespan of metal roofing better matches solar panel lifespans (25-30 years), avoiding awkward situations where roof replacement requires removing and reinstalling expensive solar arrays. Metal's strength supports solar equipment well. The main consideration involves planning solar installation before roofing if possible, as solar companies can work directly with roofers to coordinate mounting points and electrical penetrations for optimal results. Quality Metal Roofing Materials from QBM Metal roofing systems offer genuine advantages for many buildings, exceptional durability, strong weather resistance, and impressive longevity that can outlast alternatives by decades. The energy efficiency benefits reduce operating costs whilst environmental characteristics appeal to sustainability-minded property owners. Modern aesthetic options mean metal roofing suits virtually any architectural style. However, the higher initial costs, potential noise concerns, and installation complexity require careful consideration. These systems aren't universally superior; they excel in specific applications where their strengths align with building requirements and owner priorities. For Irish construction projects requiring durable, long-lasting roofing solutions, metal deserves serious consideration. The climate suits metal roofing well, with sufficient roof pitch for proper water shedding and weather conditions where metal's strength becomes valuable. QBM supplies quality metal roofing materials throughout Ireland for contractors and builders seeking reliable products. Our range includes various profiles, materials, and finishes suitable for commercial, agricultural, and residential applications. Whether you're specifying standing seam panels for a contemporary build or seeking durable roof sheets for agricultural structures, we provide the materials needed for successful installations. Explore our metal roof and façade systems to review available options and technical specifications. Our team can answer questions about product suitability, material selection, and supply logistics for your Irish projects. Contact QBM today to discuss your metal roofing material requirements.
- Metal Roofing Options for Residential Properties: A Complete Guide
Choosing roofing materials for your home involves decisions that affect your property for decades. Metal roofing has grown remarkably popular among homeowners, yet the variety of options available can feel overwhelming. Different types of metal roofing residential systems exist, each with distinct characteristics, advantages, and ideal applications. Perhaps you've seen sleek standing seam panels on contemporary homes, or maybe you've noticed traditional corrugated metal on rural properties. These represent just two among many possibilities. The metal roof landscape includes various materials, profiles, and styles, all designed to meet different architectural needs, budget constraints, and performance requirements. Understanding these differences matters before committing to an installation. Some metal roofing types suit specific climates better than others. Certain styles complement particular architectural aesthetics, whilst others clash terribly. Cost variations between different metal roofing systems can be substantial, sometimes doubling or tripling installation expenses. This guide walks through residential metal roofing types systematically, examining materials, profiles, and practical considerations. By understanding what distinguishes one system from another, you'll make informed decisions aligned with your home's requirements and your long-term objectives. Understanding Metal Roofing Materials Before exploring profiles and styles, let's examine the actual materials used in metal roofing. The metal itself determines durability, cost, appearance, and performance characteristics. Five primary materials dominate residential applications, each offering distinct properties. Material selection influences everything downstream, from installation complexity to lifespan to ongoing maintenance requirements. Choosing the wrong metal for your climate or application can undermine even a perfect installation. Steel Roofing: The Popular Workhorse Steel dominates the metal roof market for good reasons. This iron and carbon alloy combines strength, affordability, and widespread availability. Steel roofing is manufactured in various thicknesses (gauges) and protective coatings, adapted to different applications and budgets. Types of Steel Roofing Galvanised steel uses zinc coating to protect the underlying metal from corrosion. The zinc layer acts sacrificially, corroding first to preserve the steel beneath. This represents the most common steel roofing material, affordable, durable, and widely available. Galvalume steel employs a coating combining zinc and aluminium. The aluminium component improves corrosion resistance beyond standard galvanised steel, particularly in humid environments. However, the surface scratches more easily during installation, requiring careful handling. Weathering steel, designed primarily for heavy industrial use, deliberately rusts on its exterior surface to protect internal layers. It's rarely appropriate for residential structures due to ongoing corrosion and maintenance demands, though some architectural applications employ it for aesthetic effect. Steel Roofing Advantages Cost represents steel's primary advantage. Among metal roofing materials, steel typically costs the least while delivering solid performance. This affordability extends metal roofing to homeowners who couldn't otherwise afford premium materials. Durability makes steel practical for long-term use. Properly coated steel resists rust, handles weather extremes well, and maintains structural integrity for 40-60 years. The material doesn't dent as easily as softer metals like aluminium or copper. Weight considerations favour steel, too. Despite its strength, steel roofing remains relatively lightweight, reducing structural demands on roof framing. Installation becomes simpler, and buildings don't require reinforcement to handle the load. Colour and profile versatility give designers numerous options. Steel can be formed into standing seam panels, corrugated sheets, ribbed profiles, or metal shingles mimicking traditional materials. Factory-applied paint finishes come in dozens of colours, maintaining appearance for decades. Recycled content makes steel environmentally responsible. Most steel roofing contains significant recycled material, and the products themselves are fully recyclable at the end of life. Steel Roofing Limitations Whilst steel resists corrosion well with proper coating, any scratches or damaged areas can rust if not addressed. Coastal environments with salt exposure accelerate corrosion, requiring either premium coatings or consideration of alternative materials. Noise can be an issue during rain or hail without adequate insulation beneath the metal. The hard surface amplifies sounds more than softer roofing materials. Aluminium Roofing: Coastal Performance Champion Aluminium excels where corrosion resistance matters most. This lightweight, naturally abundant metal resists rust exceptionally well, making it ideal for seaside properties or humid climates where steel struggles. Aluminium's Key Benefits Corrosion resistance stands out as aluminium's defining characteristic. The metal naturally forms an oxide layer that protects against further corrosion. Salt spray, humidity, and moisture cause minimal damage, allowing aluminium roofing to thrive in coastal locations. Weight becomes significant in certain applications. Aluminium weighs roughly one-third as much as steel, easing installation and reducing structural demands. Older buildings or structures with limited load-bearing capacity can often accommodate aluminium when heavier materials would require reinforcement. Malleability allows aluminium to form into complex shapes and profiles. Manufacturers can create intricate designs, including metal tiles, shingles, or sculptured panels mimicking traditional roofing materials. Energy efficiency benefits from aluminium's high reflectivity. The material naturally reflects solar radiation, helping buildings stay cooler in hot weather. Combined with appropriate coatings, aluminium roofing can substantially reduce cooling costs. Aluminium's Drawbacks Cost exceeds steel significantly, often 150-300% more expensive for materials alone. This price premium limits aluminium's market penetration despite performance advantages. Denting susceptibility causes concern. Aluminium's softness means hail, falling branches, or even foot traffic can leave permanent dents. Whilst these rarely cause leaks, the cosmetic damage bothers some homeowners. Expansion and contraction happen more dramatically with aluminium than with steel. Temperature changes cause noticeable movement, requiring installation methods that accommodate thermal expansion without damaging panels or fasteners. Copper Roofing: Premium Aesthetics and Longevity Copper represents the luxury end of metal roofing materials. Used architecturally for centuries, copper develops distinctive patina over time whilst delivering exceptional longevity. The material suits homeowners seeking unique aesthetics and are willing to invest substantially upfront for decades of performance. Copper's Compelling Advantages Lifespan exceeds virtually all alternatives. Properly installed copper roofing lasts 80-150 years, often outliving the structures beneath. Many European buildings feature copper roofs installed centuries ago, still performing adequately. Aesthetic appeal attracts design-focused homeowners. New copper shines bright metallic orange, gradually developing green or blue-green patina as it oxidises. This colour evolution creates unique, ever-changing appearances that many find beautiful. Corrosion resistance rivals aluminium. Copper doesn't rust, and the natural patina that forms actually protects the underlying material from further degradation. Coastal environments pose minimal threat to copper roofing. Softness simplifies forming and installation compared to harder metals. Copper can be soldered, creating watertight seams impossible with other materials. Flashings, valleys, and complex details work well in copper. Weight sits between steel and aluminium, making structural considerations straightforward for most buildings. Copper's Notable Limitations Expense dramatically limits copper roofing adoption. Material costs alone can reach £60-160 per square metre, with total installed costs often exceeding £200 per square metre. This places copper beyond most residential budgets. Patina creates unpredictable appearance changes. Whilst some homeowners love the evolving colours, others dislike uncertainty about the final appearance. Environmental conditions affect patina development timing and colour, making predictions difficult. Runoff staining can damage adjacent materials. Water running off copper roofs contains copper compounds that can stain lighter-coloured walls, cladding, or paving below. Proper gutter design and installation planning mitigate this risk. Theft concerns arise with valuable copper installations. The metal's high scrap value makes copper roofs tempting targets, particularly on unoccupied buildings or remote properties. Zinc Roofing: Modern Sophistication Zinc roofing offers premium performance similar to copper but with different aesthetic characteristics. Popular in Europe for over a century, zinc increasingly appears on UK residential properties seeking contemporary appearances with exceptional longevity. Zinc's Primary Strengths Durability matches copper, with properly installed systems lasting 60-100 years. The material develops protective zinc carbonate patina that prevents further corrosion, similar to copper's protective layer but with different colours. Self-healing properties intrigue engineers. Minor scratches often repair themselves as zinc carbonate forms, maintaining weather protection even after minor damage. Weight compares favourably to other metals, simplifying installation without requiring structural reinforcement. Coastal performance rivals copper and aluminium. Salt exposure causes minimal degradation, making zinc suitable for seaside properties. Contemporary aesthetics appeal to modern architectural styles. Zinc's matte grey finish and clean lines complement minimalist designs beautifully. Zinc's Considerations Premium pricing positions zinc near copper cost levels. Expect £20-70 per square metre for materials, with installed costs exceeding £100 per square metre for quality systems. Chalking can occur where water runs off zinc surfaces, leaving white residue lines. Whilst not damaging, these marks can look unattractive on some applications. Underside protection requires anti-corrosion coatings to prevent degradation from moisture condensation on unexposed surfaces. Installation expertise matters enormously. Improper techniques can cause problems that undermine zinc's inherent durability, making contractor selection crucial. Tin Roofing: Historical Perspective Tin roofing refers to steel sheets with chemically bonded tin coating. Once common, true tin roofing has largely disappeared from residential markets. However, the term "tin roof" persists in common usage, often incorrectly describing steel or other metal roofing. Historical Context Originally, tin coating prevented steel from cracking and improved corrosion resistance. The lightweight material installed easily and lasted reasonably well. Modern decline stems from better alternatives emerging. Galvanised and galvalume steel coatings perform better than tin at similar or lower costs, whilst aluminium offers superior corrosion resistance where needed. Current Availability Finding genuine tin-coated steel roofing proves difficult today. Most suppliers stock steel with zinc or zinc-aluminium coatings instead. Costs vary dramatically when tin products are available, ranging from £4 to £16 per square metre, depending on supplier and product specifics. Standing Seam Metal Roofing Profiles Having examined materials, let's explore profiles, the physical shapes, and installation methods that define metal roof appearance and performance. Standing seam represents the premium end of residential metal roofing profiles. Standing Seam Characteristics These systems feature vertical panels running from eave to ridge with raised seams connecting adjacent panels. Seam heights typically measure 25-65mm, creating distinctive visual lines whilst serving functional purposes. Concealed fasteners represent the standing seam's defining feature. Panels attach to the roof deck using hidden clips, leaving no exposed screws on the weather surface. This eliminates thousands of potential leak points whilst creating clean aesthetics. Thermal movement accommodation happens naturally in quality standing seam systems. Panels can expand and contract with temperature changes without stressing fasteners or causing problems. Special expansion clips allow movement whilst maintaining weather-tight seals. Standing Seam Varieties Snap-lock systems join panels without special tools. Adjacent panels simply snap together, securing with concealed clips underneath. These work well for residential applications where ease of installation matters. Mechanically seamed systems employ special equipment to crimp panel edges together, creating extremely strong, weather-tight seams. This approach provides maximum wind resistance and weather protection but requires experienced contractors with proper equipment. Batten seam configurations use raised battens covering seams between panels. Whilst less common on modern residential installations, this traditional approach creates very distinctive appearances. Standing Seam Advantages Leak resistance exceeds other metal profiles dramatically. Without exposed fasteners penetrating the weather surface, standing seam roofs eliminate the most common source of metal roof leaks. Aesthetics appeal to contemporary tastes. Clean lines, flat panels, and minimal visual clutter suit modern architectural styles beautifully. The sleek appearance feels sophisticated rather than agricultural or industrial. Longevity benefits from superior design. With proper installation and quality materials, standing seam roofs last 50-75+ years, sometimes exceeding 100 years in ideal conditions. Snow and debris shedding happen efficiently. The smooth surface and raised seams help snow slide off whilst preventing debris accumulation that could damage other roof types. Standing Seam Limitations Cost remains the primary obstacle for many homeowners. Standing seam installation costs 2-3 times more than exposed fastener alternatives. Material costs run higher, and labour expenses increase due to complexity and required expertise. Installation complexity demands experienced contractors. Improper techniques cause performance problems that negate the system's inherent advantages. Finding qualified installers can prove challenging in some regions. Low-slope limitations exist for certain standing seam systems. Minimum pitch requirements vary by product, but some systems won't perform adequately below 3:12 or 4:12 slopes. Corrugated Metal Roofing Profiles Corrugated profiles feature the classic wavy pattern many associate with metal roofing. These alternating ridges and valleys create strength through geometry whilst providing distinctive agricultural or industrial aesthetics. Corrugated Profile Characteristics The continuous wave pattern, peaks and valleys running the panel's length, creates the recognisable corrugated appearance. No flat sections exist; the entire surface curves rhythmically. Exposed fasteners penetrate the panel directly, securing it to the underlying structure. Each panel requires dozens of screws, creating thousands of penetrations across a roof. Weatherproof washers seal around fasteners, but these seals can fail over time. Installation simplicity makes corrugated profiles accessible to less experienced installers. The straightforward overlap-and-fasten approach requires basic skills rather than specialized training. Corrugated Applications Agricultural buildings commonly use corrugated metal for cost-effectiveness and adequate performance. Barns, sheds, and outbuildings benefit from the economical protection corrugated roofing provides. Industrial structures favour corrugated profiles where budget constraints matter more than aesthetics. Warehouses, workshops, and utilitarian buildings often employ this profile. Residential applications work for specific architectural styles, particularly rustic, farmhouse, or industrial-modern designs. However, many neighbourhoods and planning authorities restrict or prohibit corrugated roofing on primary residences. Corrugated Advantages Economy defines corrugated roofing's appeal. Material costs often run 50-60% less than standing seam, with labour costs similarly reduced. This makes metal roofing accessible to tighter budgets. Installation speed benefits from simplicity. Even relatively inexperienced installers can complete corrugated installations competently, reducing labour time and costs. Structural strength from the corrugations themselves provides good spanning capability. The geometric strength allows panels to bridge longer distances between supports than flat profiles. Oil canning resistance comes from the corrugation pattern. The continuous curves prevent the visible waviness that sometimes affects flat metal panels. Corrugated Limitations Leak potential from exposed fasteners requires ongoing attention. Washers degrade over time, screws work loose, and each penetration point represents potential water entry. Annual inspections help catch problems before they cause damage. Aesthetics limit residential acceptance. The industrial appearance doesn't suit all architectural styles or neighbourhood standards. Many homeowners find corrugated roofing visually unappealing on homes. Noise levels during rain can be objectionable without proper insulation beneath. The hard, ridged surface can amplify rainfall sounds significantly. Ribbed Panel Metal Roofing Ribbed profiles, sometimes called "R-panel" or similar designations, combine characteristics of both standing seam and corrugated systems. These panels feature mostly flat surfaces with periodic vertical ribs running their length. Ribbed Profile Design Flat surface areas dominate, interrupted by raised ribs typically spaced 300-450mm apart. This creates cleaner visual lines than corrugated profiles whilst providing structural strength. Exposed fasteners attach panels to the roof deck, similar to corrugated systems. However, rib placement often conceals fasteners partially, improving appearance compared to fully exposed corrugated fasteners. Wider coverage compared to standing seam panels means fewer seams across the roof. Each panel typically covers more area, potentially reducing installation time. Ribbed Panel Applications Commercial buildings frequently employ ribbed panels for cost-effective protection with acceptable aesthetics. Retail stores, office buildings, and industrial facilities commonly use this profile. Residential applications work well for modern, contemporary, or transitional architectural styles. The cleaner lines suit homes better than corrugated profiles, whilst costing less than standing seam. Agricultural uses include higher-value structures where appearance matters somewhat, but budgets remain constrained. Ribbed Panel Benefits Balanced cost positions ribbed panels between corrugated and standing seam pricing. Homeowners get improved aesthetics over corrugated without the standing seam's premium costs. Installation accessibility means more contractors can work with ribbed panels competently. The learning curve sits below the standing seam requirements. Aesthetic versatility allows ribbed panels to work with various architectural styles, from modern farmhouses to contemporary commercial buildings. Spanning capacity handles larger distances between supports than many other exposed fastener panels, potentially reducing structural material requirements. Ribbed Panel Considerations Fastener exposure still creates maintenance requirements and potential leak points, though fewer than corrugated systems. Appearance remains more utilitarian than standing seam, potentially limiting applications where premium aesthetics matter. Thermal movement requires proper fastening techniques. Over-tightening restricts natural expansion/contraction, potentially causing problems. Metal Shingle and Tile Profiles Metal shingles and tiles mimic traditional roofing materials whilst delivering metal's performance advantages. These products appeal to homeowners wanting metal durability with conventional aesthetics. Metal Shingle Characteristics Individual panels resemble asphalt shingles, slate, wood shakes, or tiles. Manufacturers imprint realistic textures and patterns that replicate traditional materials surprisingly well. Interlocking edges create weather-tight seals between shingles whilst allowing some thermal movement. Installation methods vary by product but generally resemble traditional shingling techniques more than panel installation. Stone coating on some products adds texture and sound-dampening. Crushed stone bonded to metal surfaces creates an authentic appearance whilst reducing rain noise. Metal Tile Features Larger than shingles, metal tiles typically replicate clay or concrete tile profiles. The dimensional shapes create shadows and depth, impossible with flat panels. Multiple panel configurations allow various laying patterns. Some products offer different tile shapes for different roof areas, field tiles, ridge tiles, valley tiles, etc. Shingle and Tile Advantages Traditional appearance lets metal roofing work in neighbourhoods or on historic properties where panel profiles would look inappropriate. Planning permissions sometimes restrict roof appearance; metal shingles bypass these constraints. Moderate costs typically exceed corrugated or ribbed panels but cost less than standing seam. Homeowners get metal benefits without premium standing seam expenses. Ease of replacement for damaged sections improves over panel systems. Individual shingles or tiles can be replaced without disturbing large roof areas. Reduced thermal movement compared to long panels minimizes expansion/contraction concerns. Smaller individual pieces move less noticeably than 6-meter panels. Shingle and Tile Limitations Installation complexity exceeds simple panel systems. More pieces, more individual fastenings, and more attention to detail increase labour time and costs. Leak potential rises with more seams and fasteners. Though still better than asphalt shingles, metal shingles create more penetrations than standing seam panels. Weight varies but can exceed panel systems, particularly with stone-coated products. Structural capacity should be verified before installation. Lifetime costs may exceed panels if more frequent maintenance becomes necessary due to complexity. Insulated Metal Panels Insulated metal panels integrate rigid foam insulation between two metal faces. These composite panels provide roofing and insulation simultaneously, particularly popular for commercial applications but increasingly used residentially. Insulated Panel Construction Polyurethane or polyisocyanurate foam cores bond to interior and exterior metal faces. Core thickness varies from 25mm to 150mm+ depending on insulation requirements. Interlocking edge designs create thermal breaks whilst providing weather-tight seams. Tongue-and-groove or similar profiles prevent thermal bridging that would reduce insulation effectiveness. Insulated Panel Benefits Thermal performance exceeds that of separately installed metal roofing and insulation. Continuous insulation without gaps or compression outperforms traditional batt insulation between rafters. Installation speed increases dramatically. One product provides structure, weather protection, and insulation, potentially halving installation time compared to separate systems. Condensation control improves with proper design. The insulation prevents temperature differentials that cause condensation on metal surfaces. Structural spanning lets insulated panels bridge longer distances, sometimes eliminating intermediate support requirements. Insulated Panel Considerations Upfront costs exceed conventional metal roofing significantly. Premium pricing for materials and installation expertise adds up quickly. Weight increases substantially compared to non-insulated panels. Structural capacity must accommodate the additional load. Damage repair becomes more complex. Damaged panels often require complete replacement rather than simple repairs. Choosing the Right Metal Gauge Metal thickness, measured in gauge, significantly affects performance, cost, and longevity. Understanding gauge selection helps optimize roofing performance for your application. Gauge System Basics Gauge numbers work inversely; higher numbers indicate thinner metal. 29-gauge measures approximately 0.36mm thick; 22-gauge measures roughly 0.76mm. Residential applications typically use 26- to 29-gauge for exposed fastener systems and 22- to 24-gauge for standing seam. Thicker gauges provide more strength but cost substantially more. Gauge Selection Factors Climate severity influences gauge requirements. Areas experiencing frequent hail, high winds, or heavy snow loads benefit from heavier gauges that resist damage and handle loads better. Panel profile affects appropriate gauge ranges. Standing seam systems require thicker materials than corrugated profiles due to larger flat areas prone to denting or oil canning. Budget constraints often dictate gauge choices. A 29-gauge system costs significantly less than a 24-gauge system, sometimes determining feasibility for cost-conscious projects. Longevity expectations should influence selection. Thicker gauges generally last longer with less maintenance, though proper coatings matter more than thickness alone for corrosion resistance. Gauge Recommendations Standard applications in moderate climates work well with 26-gauge for most exposed fastener systems and 24-gauge for standing seam. Severe weather areas should consider 24-gauge minimum for exposed fasteners and 22-gauge for standing seam installations. Premium installations seeking maximum longevity benefit from 22-gauge regardless of profile, though costs increase accordingly. Budget-conscious projects can use 29-gauge for sheltered applications with minimal weather exposure, accepting potentially shorter lifespan or earlier maintenance requirements. Colour and Coating Options Factory-applied finishes protect metal roofing whilst providing colour and aesthetic appeal. Understanding coating types helps select appropriate products for longevity and appearance. Common Coating Types Polyester paints offer economy and reasonable performance. These basic coatings provide colour and UV protection at the lowest cost but fade faster than premium options. Expect 10-20 year colour retention. Silicone-modified polyester (SMP) improves over basic polyester with better fade resistance and chalk resistance. Middle-tier pricing makes SMP popular for residential applications. Colour retention typically spans 20-30 years. Polyvinylidene fluoride (PVDF/Kynar) represents premium coating technology. Exceptional fade resistance, chalk resistance, and colour stability come at higher costs. Quality PVDF coatings maintain appearance for 30-40+ years. Stone coating bonds crushed stone to the paint basecoat, creating a textured surface with a natural appearance. Popular on metal shingles and tiles, stone coatings provide excellent colour retention and sound dampening. Colour Considerations Light colours reflect more solar radiation, reducing heat gain and improving energy efficiency. White, light grey, and pastels work best for cooling benefits. Dark colours absorb heat, potentially beneficial in cold climates where heat gain helps. However, thermal expansion increases with darker colours, requiring careful installation. Colour matching to existing structures or neighbourhood aesthetics matters for cohesive appearance. Most manufacturers offer 20-40 standard colours plus custom matching for premium fees. Gloss levels affect appearance and maintenance. High-gloss finishes show dirt and imperfections more readily but clean more easily. Matte finishes hide flaws but may be harder to clean. Cost Considerations Across Metal Roofing Types Metal roofing costs vary dramatically based on material, profile, and quality selections. Understanding price ranges helps realistic budget planning. Roofing Type Material Cost (per m²) Installed Cost (per m²) Typical Lifespan Annual Cost (per m²) Corrugated Steel £8-15 £45-75 30-40 years £1.50-2.50 Ribbed Steel Panels £12-20 £55-85 35-45 years £1.50-2.40 Standing Seam Steel £25-45 £95-140 50-75 years £1.30-2.80 Aluminium Panels £30-60 £110-170 40-60 years £2.00-4.25 Metal Shingles (Steel) £18-35 £70-120 40-50 years £1.60-3.00 Copper Sheets £60-160 £180-300+ 80-150 years £1.50-3.75 Zinc Panels £20-70 £100-200 60-100 years £1.40-3.30 These ranges reflect material and installation variability, gauge thickness, coating quality, contractor rates, and project complexity, all of which affect actual costs. Value Assessment Lifetime cost analysis often favours premium materials despite higher upfront investment. A standing seam steel roof costing £110 per square metre lasting 60 years delivers better value than corrugated, requiring replacement every 30 years at £60 per square metre. However, upfront budget constraints matter enormously. Many homeowners simply cannot access capital for premium installations regardless of long-term value. Financing costs must factor into calculations. Borrowing money to install premium roofing may negate lifetime savings if interest expenses eat up the difference. Installation Considerations and Requirements Proper installation determines whether metal roofing delivers promised performance. Several factors influence installation success. Contractor Selection Experience with specific metal roofing types matters enormously. Standing seam installation requires different skills from corrugated panels. Verify contractors have relevant experience with your chosen system. Manufacturer certification provides quality assurance. Many metal roofing manufacturers offer training and certification programs; certified installers understand proper techniques and often provide better warranties. References and portfolio reviews reveal contractor capabilities. Examine previous work, speak with past clients, and verify satisfaction before committing. Roof Preparation Requirements Solid decking works best for most residential metal roofing. OSB or plywood sheathing creates a stable substrate for fasteners and provides secondary weather protection. Underlayment requirements vary by system. Standing seam often works well with synthetic underlayment, whilst some exposed fastener systems use traditional felt. Follow manufacturer specifications exactly. Ventilation systems must accommodate metal roofing. Proper attic ventilation prevents condensation on metal undersides whilst improving energy efficiency. Installation Complexity Factors Roof slope affects installation difficulty and system selection. Very low slopes require special systems designed for minimal pitch. Steep slopes create safety challenges requiring additional precautions. Roof complexity, valleys, dormers, penetrations, etc., dramatically affect labour costs and installation time. Simple rectangular roofs install far faster than complex multi-plane designs. Weather conditions during installation matter. Metal roofing shouldn't be installed during rain or high winds. Temperature extremes can affect proper panel expansion allowances. Maintenance Requirements Across Metal Types Different metal roofing types demand varying maintenance levels. Understanding ongoing care requirements prevents surprises. General Metal Roof Maintenance Annual inspections identify developing problems before they cause damage. Check fasteners, seams, flashings, and any penetrations for degradation or loosening. Debris removal prevents water backup and deterioration. Keep valleys, gutters, and low-slope areas clear of leaves, branches, and accumulated material. Surface cleaning maintains appearance, particularly with light colours showing dirt. Occasional washing with mild detergent preserves aesthetics. System-Specific Requirements Exposed fastener systems need periodic fastener checks. Washers degrade over 5-10 years, depending on climate, requiring inspection and potential replacement. Standing seam systems require less frequent maintenance but benefit from professional inspections, ensuring clips and seams remain secure. Painted finishes may need touch-up or recoating after 20-40 years, depending on coating quality and climate exposure. Frequently Asked Questions Can metal roofing be installed directly over existing asphalt shingles, or must they be removed first? Metal roofing can sometimes be installed over one layer of existing shingles, potentially saving removal costs and disposal fees. However, most roofing professionals recommend complete shingle removal before metal installation. Installing over shingles prevents inspection of the roof decking for damage or rot, creates uneven surfaces affecting metal panel performance, traps moisture between layers, potentially causing deck deterioration, and voids many manufacturer warranties. The short-term cost savings rarely justify long-term risks. Proper installation on clean decking ensures maximum metal roof performance and longevity, making removal the preferred approach despite higher initial costs. How do metal roofing types perform in extreme weather conditions like hurricanes or severe hail? Metal roofing generally outperforms traditional materials in extreme weather when properly installed. Standing seam systems with concealed fasteners provide exceptional wind resistance, often rated for 150+ mph winds, far exceeding most asphalt shingles. Hail resistance depends on metal gauge and type; 24-gauge steel resists denting from golf ball-sized hail, whilst softer metals like aluminium or copper may dent from smaller impacts, though rarely leak. Thicker gauges (22-24) handle severe weather better than thin options (26-29). Hurricane-prone regions should specify heavy-gauge standing seam with mechanical seaming and engineering certifications for maximum protection and potential insurance discounts. What minimum roof pitch requirements exist for different metal roofing types? Minimum pitch requirements vary significantly by metal roofing profile and system design. Standing seam systems typically require a 3:12 pitch minimum, though some low-slope systems work down to 1:12 with proper sealing and installation. Exposed fastener panels, like corrugated or ribbed, usually need a 3:12 minimum pitch for adequate water shedding without leakage concerns. Metal shingles generally require a 4:12 or steeper pitch to function properly and maintain warranties. Flat or very low-slope applications demand specialized systems with additional waterproofing measures beyond standard metal roofing. Always verify manufacturer specifications for your chosen system and actual roof pitch before purchasing materials. Do different metal roofing materials expand and contract at different rates, requiring special installation techniques? Yes, thermal expansion rates vary significantly between metals, directly affecting installation requirements. Aluminium expands roughly twice as much as steel over identical temperature ranges, requiring more allowance for movement in fastening systems. Copper and zinc also expand considerably, necessitating special clips and fastening methods that accommodate movement without stressing panels or causing fastener failure. Longer panel runs amplify expansion effects; a 12-meter aluminium panel moves much more than a 6-meter panel. Proper installation accounts for these differences through expansion clips, slotted fastening holes, or snap-together systems, allowing panel float. Installers experienced with specific metals understand these requirements; improper techniques cause oil canning, fastener withdrawal, and potential leaks. How does metal roofing installation affect solar panel placement and integration? Metal roofing actually simplifies solar panel installation compared to asphalt shingles, particularly standing seam systems. Standing seam roofs accept clamp-mounted solar attachments that secure directly to raised seams without penetrating the roof surface, eliminating leak risks associated with penetration-style mounts. This non-penetrating approach also means solar removal for eventual roof replacement becomes unnecessary since metal roofs outlast solar panels (25-30 years typical panel life vs. 50-75+ year metal roof life). Exposed fastener systems require penetrating mounts like asphalt shingles, but metal's durability handles repeated mounting/remounting better. Coordinating roof and solar installation timing maximizes integration benefits,and installers can plan optimal panel placement and mounting locations during initial roof design. Source Quality Metal Roofing Materials from QBM Different types of metal roofing residential systems offer distinct advantages for specific applications, budgets, and aesthetic preferences. Steel remains popular for balanced cost and performance. Aluminium excels in coastal environments. Copper and zinc deliver premium longevity with unique appearances. Profile choices, standing seam, corrugated, ribbed, or metal shingles, each suit particular architectural styles and performance requirements. Understanding these variations helps match metal roofing to your home's needs. Climate considerations, budget constraints, aesthetic preferences, and longevity expectations all influence optimal selections. What works brilliantly for one property may prove unsuitable for another. The decision involves weighing immediate costs against long-term value, balancing performance requirements against budget realities, and considering how roofing choices affect your home's appearance and neighbourhood compatibility. For Irish residential and commercial projects requiring quality metal roofing materials, QBM supplies a range of profiles and products suitable for diverse applications. Whether you're specifying standing seam panels for contemporary construction, corrugated sheets for agricultural buildings, or any other metal roofing configuration, we provide the materials contractors need for successful installations throughout Ireland. Explore our metal roof and façade systems to review available profiles, materials, and technical specifications. Our team can answer questions about product selection, material compatibility, and supply logistics for your Irish projects. Contact QBM today to discuss metal roofing material requirements and find solutions suited to your specific applications.
- EPDM vs TPO Roofing: Choosing the Right Single-Ply Membrane
If you are weighing up EPDM roofing vs TPO roofing for a flat roof project, you are not alone. These two single-ply membrane roofing systems dominate the commercial and residential roofing market, and for good reason. Both are reliable, relatively affordable, and widely available. But picking between them is not always straightforward. This guide breaks down the real differences between EPDM and TPO, covering everything from installation cost and lifespan to weather resistance and maintenance. Whether you are sourcing materials for a large commercial building or a smaller domestic extension, the details here should help you make a more confident decision. What Is EPDM Roofing? EPDM stands for ethylene propylene diene monomer, which is a type of synthetic rubber. In practical terms, EPDM is a flexible, dark-coloured roofing membrane that has been used on flat and low-slope roofs since the 1960s. It has a long track record, and that history gives specifiers and contractors a good deal of confidence. EPDM roofing systems are typically supplied in large sheets, either 1.2 mm or 1.5 mm thick, and they can be installed using adhesive, mechanical fasteners, or ballast. The material itself is remarkably durable; it resists UV radiation, ozone, and temperature extremes without becoming brittle. Key Characteristics of EPDM Available in black or white, though black is far more common Lifespan of 25 to 50 years with proper maintenance Performs well across a wide range of climate conditions Seams are bonded with adhesive or seam tape rather than heat welding Low-cost material with a proven history on commercial buildings What Is TPO Roofing? TPO roofing, or thermoplastic polyolefin, arrived on the market more recently, gaining traction through the 1990s and early 2000s. TPO roofing systems are roof membranes made from a blend of polypropylene and ethylene-propylene rubber, reinforced with polyester. The result is a white or light-coloured membrane that reflects sunlight rather than absorbing it. One thing worth noting: TPO has gone through several formula revisions over the years. Early versions had some well-documented performance issues, but modern TPO membranes are considerably more robust. Still, the material does not have quite the same decades-long track record as EPDM. Key Characteristics of TPO Typically white, which helps reduce cooling costs in warmer months Seams are heat-welded, creating strong, watertight bonds Higher resistance to punctures than EPDM in many formulations Popular for commercial roofing where energy efficiency matters Available in varying thicknesses, commonly 1.2 mm or 1.5 mm EPDM vs TPO: Side-by-Side Comparison Sometimes it helps to see the differences laid out simply. The table below summarises the core attributes of each membrane roof type. Feature EPDM TPO Material Type Synthetic rubber (thermoset) Thermoplastic polyolefin Colour Mostly black; white available Typically white or light grey Lifespan 25 to 50 years 15 to 30 years Seam Method Adhesive or tape-bonded Heat-welded seams UV Resistance Excellent Very good (reflective) Puncture Resistance Moderate Higher in most formulations Installation Cost Generally lower Slightly higher Energy Efficiency Lower (dark surface absorbs heat) Higher (reflective surface) Maintenance Low; seam resealing over time Low; periodic inspections Cost: Which Membrane Offers Better Value? For many projects, cost is the deciding factor, or at least the starting point. EPDM roofing typically has a lower upfront cost compared to TPO, which makes it appealing for budget-conscious builds. The material itself is a low-cost material relative to other commercial roofing products, and installation tends to be quicker because adhesive-bonded seams do not require specialist welding equipment. TPO is not wildly more expensive, but the heat-welding process can add to labour costs, and the equipment needed is more specialised. That said, if you factor in long-term energy savings from TPO's reflective surface, the total cost of ownership might balance out, particularly on larger commercial buildings where cooling costs add up. When EPDM Makes Financial Sense Smaller projects where material savings matter most Buildings in cooler climates where reflectivity is less critical Roof replacement projects with tight budgets When TPO Might Be Worth the Extra Spend Larger commercial properties with significant cooling loads Projects where energy performance targets need to be met New builds where the specification calls for a reflective membrane Durability and Lifespan This is where things get interesting. EPDM roofs tend to last longer than TPO roofs, at least on paper. A well-installed EPDM membrane roof can perform for 30 years or more, and some manufacturers offer warranties stretching to 50 years. The rubber composition handles thermal cycling, UV exposure, and general weathering exceptionally well. TPO, on the other hand, typically comes with warranties in the 15 to 25 year range. Now, that does not mean TPO membranes will fail at the 15-year mark; plenty of installations are going strong well beyond that. But the shorter track record means there is slightly less certainty about long-term performance. Early TPO formulations did experience premature cracking and seam failures, which perhaps unfairly coloured the material's reputation. Modern TPO products have addressed most of those early concerns. Still, if longevity is your top priority, EPDM has the edge here. Installation: What to Consider Both EPDM and TPO are single-ply systems, so installation is relatively straightforward compared to built-up roofing or liquid-applied membranes. But the methods differ, and those differences matter. EPDM Installation EPDM sheets are typically laid out and bonded to the substrate with adhesive or mechanically fastened at the perimeters and seams. The seam is sealed with tape or liquid adhesive. This approach works well and does not need hot-air welding tools, which means fewer risks on site and, in many cases, faster completion. TPO Installation TPO membranes require heat welding at the seams, which creates a fused, monolithic bond. When done correctly, these heat-welded seams are arguably stronger than adhesive-bonded ones. However, the quality of the weld depends heavily on the installer's skill and the ambient conditions. Too much heat, too little, or welding in damp weather can all affect seam integrity. For contractors who regularly work with TPO, this is second nature. But if you are sourcing materials and want a system that is more forgiving during installation, EPDM is perhaps the safer option. Maintenance and Repairs Neither EPDM nor TPO demands excessive upkeep. Both are considered low-maintenance roofing membrane systems, which is part of their appeal for commercial and residential flat roof applications. EPDM Maintenance EPDM roofs benefit from periodic inspections, particularly around seams and flashings. Over time, adhesive-bonded seams may lift or peel, especially in areas with heavy foot traffic or standing water. Repairs are relatively simple: clean the area, apply new adhesive or patch material, and reseal. Most roofing service suppliers stock EPDM repair kits. TPO Maintenance TPO's heat-welded seams generally hold up well and are less prone to peeling than adhesive bonds. Maintenance mostly involves clearing debris, checking for damage after storms, and ensuring drainage is working properly. If a TPO membrane does sustain damage from punctures or impact, patching it requires heat-welding equipment, which can make small repairs a bit more involved. Pros and Cons at a Glance EPDM: Pros Proven track record spanning several decades Lower material and installation costs for most projects Excellent flexibility in cold temperatures Simple, accessible repairs without specialist tools EPDM: Cons Dark colour absorbs heat, which may raise cooling demands Adhesive seams can degrade over extended periods Less resistant to punctures than some TPO formulations TPO: Pros Reflective white surface reduces thermal gain on the building Heat-welded seams offer strong, reliable bonds Good chemical and puncture resistance Increasingly popular for green building certifications TPO: Cons Shorter proven lifespan compared with EPDM Installation quality depends heavily on welder's skill Earlier product generations had reliability concerns Which One Should You Choose? There is no single right answer, and honestly, both materials are solid choices for flat roof projects. The best option depends on your specific priorities. If you value a long, well-documented lifespan and want the lowest possible installation cost, EPDM is hard to beat. It is a tried-and-tested product that performs reliably across varied climate conditions, and sourcing materials is straightforward through suppliers like QBM. If energy efficiency and reflectivity are higher on your list, particularly for a larger commercial building, TPO is worth serious consideration. The upfront cost is somewhat higher, but the potential savings on cooling and the strong seam performance can make it a worthwhile investment. Perhaps the most practical approach is to think about the building's specific needs: its location, size, expected foot traffic, insulation levels, and budget. Sometimes the choice is obvious; other times, either system would work perfectly well. Frequently Asked Questions Is EPDM or TPO better for commercial flat roofs? Both are widely used on commercial flat roofs, and neither is objectively better in all situations. EPDM tends to be the preferred choice where budget and proven longevity matter most. TPO is often specified when energy efficiency or reflectivity requirements are part of the building design. The right answer depends on the project's priorities, the local climate, and the performance targets set by the specifier. Consulting a materials supplier like QBM can help clarify which products best fit your requirements. How long does EPDM roofing last compared to TPO? EPDM roofing can last anywhere from 25 to 50 years when properly installed and maintained, giving it a strong advantage in terms of expected service life. TPO roofs typically offer 15 to 30 years of reliable performance, though modern formulations are pushing that upper boundary further. The difference largely comes down to the material composition; EPDM's synthetic rubber base handles long-term weathering and UV degradation more gracefully than TPO's thermoplastic blend. Are TPO seams stronger than EPDM seams? Heat-welded TPO seams are generally considered stronger and more durable than adhesive-bonded EPDM seams, primarily because the welding process fuses the membrane layers into a single piece. Adhesive and tape seams on EPDM can loosen over time, particularly in areas with standing water or significant temperature swings. That said, a poorly executed TPO weld can be weaker than a properly applied EPDM seam, so installer skill plays a significant role in the final result. Can I use EPDM on a green or living roof? EPDM is commonly used as a waterproofing layer beneath green roof assemblies. Its flexibility and resistance to root penetration make it well-suited for this application. However, you would typically need a root barrier or a specifically rated EPDM product to prevent plant roots from damaging the membrane over time. TPO can also work in green roof systems, though EPDM's longer lifespan and flexibility give it a slight advantage for this particular use case. Does QBM supply both EPDM and TPO roofing products? Yes, QBM supplies a range of EPDM and TPO roofing materials, along with accessories, adhesives, and trims needed for a complete installation. As a roofing materials supplier, QBM focuses on providing quality products and technical support to help contractors, builders, and specifiers source the right membrane for each project. Whether you need a full roof replacement kit or specific components, the QBM team can advise on the most suitable options. What is the main environmental difference between EPDM and TPO? The most notable environmental distinction is surface reflectivity. TPO's white surface reflects a significant proportion of solar radiation, which can lower the building's cooling energy demand and reduce its carbon footprint during warmer months. EPDM absorbs more heat due to its dark colour, which might actually benefit buildings in colder regions by contributing a small amount of passive thermal gain. Both materials can be recycled at end of life, though recycling availability varies by region. Get the Right Roofing Membrane for Your Next Project Choosing between EPDM and TPO does not have to be complicated. QBM supplies a full range of roofing materials and products for both membrane types, backed by knowledgeable support to help you match the right system to your project. Whether you are pricing up materials for a commercial roof replacement or sourcing products for a smaller domestic build, get in touch with the QBM team today. We are here to help you find exactly what you need.
- How EPDM Roofing Performs in Cold Climates and Winter Conditions
There is a question that comes up surprisingly often among contractors, specifiers, and self-builders: is EPDM roofing suitable for cold climates? The short answer is yes, and it is perhaps one of the strongest arguments in favour of choosing EPDM for flat roof projects in the UK and beyond. But a short answer only gets you so far. This article looks at why EPDM performs so well when temperatures drop, how it holds up through freeze-thaw cycles, and what you should keep in mind if you are sourcing materials for a winter roofing project. Why EPDM Handles Cold Weather So Well EPDM, or ethylene propylene diene monomer, is a synthetic rubber. That rubber composition is exactly what gives it an advantage in colder weather. Unlike rigid roofing materials that can become brittle when the temperature falls, EPDM stays flexible. It does not crack, split, or lose its shape when exposed to frost or sub-zero conditions. Most EPDM roofing products are rated to remain flexible down to approximately -45°C. That is well below anything the UK climate will throw at a roof, and it means the membrane can expand and contract with temperature changes without suffering damage. Think about it this way: a flat roof takes a beating from thermal movement. During winter, the surface temperature can swing from near-freezing at night to several degrees warmer during the day. EPDM absorbs that movement comfortably, which is part of the reason it has been a trusted material on commercial and residential roofs for over 50 years. EPDM vs Other Flat Roofing Materials in Cold Conditions It is worth putting EPDM's cold weather performance into context by comparing it with a few common alternatives. Feature EPDM Felt / Built-Up GRP (Fibreglass) Flexibility Below 0°C Excellent; remains pliable Poor; becomes stiff and brittle Very poor; rigid by nature Freeze-Thaw Resistance Strong; rubber absorbs movement Moderate; can crack at joints Weak; prone to micro-cracking Winter Installation Possible with precautions Difficult; adhesives struggle Not recommended below 5°C Lifespan in Cold Climates 25 to 50 years 10 to 20 years 20 to 30 years Ponding Water Tolerance High; no degradation Low to moderate Moderate Where does fibreglass stand in comparison? GRP is a solid material for many applications, but its rigidity works against it in cold conditions. It cannot flex with the structure beneath it, and that lack of give means micro-cracks can develop over repeated frost cycles. EPDM does not share that vulnerability. Felt roofing, meanwhile, tends to stiffen and lose adhesion at lower temperatures. It can still work, of course, but it is far less forgiving than rubber roofing when winter really sets in. How Freeze-Thaw Cycles Affect Flat Roofs Freeze-thaw cycles are one of the most damaging forces a flat roof will face in a cold climate. Water settles on the surface, freezes, expands, then thaws and contracts. Repeat that process dozens of times over a winter season, and less resilient materials start to show wear. EPDM's elasticity is invaluable here. The membrane stretches as ice forms and returns to shape once it melts. There is no cracking, no delamination, no gradual weakening of the surface. For buildings in areas that experience regular frost, this kind of resilience matters more than you might expect. A few things that make freeze-thaw particularly hard on other roofing systems: Rigid membranes cannot absorb the expansion and contraction Seam joints on felt and modified bitumen roofs are vulnerable to separation Ponding water, if not properly drained, creates repeated stress points Exterior flashings and edge details are often the first to fail EPDM does not eliminate these concerns entirely, but it handles them far better than most alternatives. Installing EPDM in Winter: Is It Practical? Here is where things get a bit more nuanced. Installing an EPDM rubber roof in winter is absolutely possible, but there are a few precautions worth noting. The membrane itself stays flexible in cold conditions, which is good. The adhesives and primers used during installation, however, can behave differently when temperatures drop. Tips for Cold Weather Installation Check the adhesive manufacturer's temperature guidelines; most contact adhesives require a minimum of 5°C for proper curing Store adhesives, primers, and EPDM roofing kits in a warm, dry space before use Work during the warmest part of the day if possible Ensure the roof deck is dry and free of frost before laying the membrane Allow extra curing time, as cold weather slows the bonding process Some installers prefer mechanically fastened systems during colder weather, as these rely less on adhesive bonds. That approach can reduce the likelihood of adhesion issues and speed up the process when conditions are not ideal. The key takeaway? EPDM can be installed in cold weather, but preparation and product storage matter more than usual. Snow Accumulation and EPDM Performance Snow on a flat roof is not inherently a problem, but it does add weight. Most flat roof structures in the UK are designed to handle typical snow loads, and EPDM itself is unaffected by snow sitting on its surface. The membrane will not degrade, stain, or weaken under prolonged snow cover. That said, heavy snow accumulation on older or poorly supported structures can cause issues, though that is a structural concern rather than a membrane one. If you are working on a roof restoration or replacement project, it is worth checking the structural capacity before specifying any roofing system. One thing to watch for: when snow melts, the water needs somewhere to go. Flat roofs with poor drainage can experience ponding water, which over time may stress seams and flashings. EPDM handles standing water better than most roofing materials, but proper falls and drainage should always be part of the design. Energy Efficiency in Cold Climates This is a point that sometimes gets overlooked. EPDM can significantly reduce heat loss through a flat roof when paired with the right insulation. The membrane itself is not an insulator, but it creates a reliable, watertight seal that protects the insulation layer beneath it. In colder climates, keeping warm air inside the building is arguably more important than reflecting solar heat. Black EPDM absorbs a small amount of solar energy, which can provide a marginal thermal benefit during winter months. It is not a game-changer by any means, but it is a slight advantage over highly reflective white membranes when heating, not cooling, is your primary concern. For commercial buildings with large flat roof areas, that sealed, unbroken exterior membrane makes a real difference to overall thermal performance. Air leakage through poorly sealed roofing systems is one of the biggest sources of heat loss, and a well-installed EPDM membrane addresses that directly. Longevity of EPDM in Cold Regions EPDM roofing has a well-documented service life of 25 to 50 years, and cold climates do not appear to shorten that range in any meaningful way. In fact, some of the longest-performing EPDM installations are in northern Europe and Scandinavia, where winters are considerably harsher than in the UK. The material's resistance to UV degradation, ozone, and temperature extremes all contribute to its long-term durability. Unlike some roofing membranes that gradually harden and lose elasticity over time, EPDM retains its flexibility throughout its lifespan. That ongoing pliability is what keeps it performing through year after year of thermal cycling. Maintenance During Winter Months EPDM roofs require very little maintenance in general, and winter does not change that significantly. A few sensible steps can help keep things in good condition: Clear debris from gutters and drainage outlets before winter arrives Inspect seams and flashings in autumn to catch any issues early Remove heavy snow accumulation if the structure is older or lightweight Check for ponding water after thaw periods and address drainage problems Repairs during winter are possible, though adhesive-based patches may need warmer conditions to bond properly. For urgent fixes in cold conditions, mechanical patch systems or self-adhesive tapes designed for lower temperatures can serve as a temporary solution until conditions improve. The cost of maintaining an EPDM roof through winter is minimal. There are no specialist treatments, no annual coatings, and no seasonal restoration work required. It is, quite honestly, one of the more hands-off roofing systems available. Common Concerns About EPDM in Cold Climates Even with all the evidence in its favour, a few concerns come up regularly. Let us address them directly. "Won't the rubber shrink in the cold?" EPDM does contract slightly in colder weather, but it is manufactured with this in mind. Properly installed membranes with adequate allowance for movement will not pull away from edges or flashings. "What about condensation underneath?" Condensation is a ventilation and insulation issue, not a membrane issue. As long as the roof build-up includes a proper vapour control layer and adequate insulation, condensation should not be a problem. "Is it slippery when frozen?" Any roof surface can be slippery when wet or icy. EPDM is no exception. If regular roof access is needed during winter, walkway pads or non-slip strips should be considered. Frequently Asked Questions Can EPDM roofing be used on pitched roofs in cold areas? EPDM is primarily designed for flat and low-slope roofs, but it can be applied to pitched structures with the right detailing. In cold areas, the membrane's flexibility is a genuine asset on any roof profile, as it accommodates thermal movement without cracking. Pitched applications typically require mechanical fastening rather than adhesive bonding, especially at steeper angles. For most residential and commercial cold-climate projects, flat or low-slope remains the most common and practical application for an EPDM membrane. How does EPDM compare to liquid-applied roofing in winter? Liquid-applied roofing systems are highly sensitive to temperature and moisture during application. Most require conditions above 5°C and completely dry surfaces, which limits their use during colder months. EPDM, by contrast, can be laid in cooler weather with appropriate adhesive choices or mechanical fixing. Once cured, liquid-applied systems perform reasonably well in cold climates, but the installation window is far narrower than what EPDM allows. For winter projects, EPDM offers significantly more flexibility in scheduling and execution. Does EPDM roofing need extra insulation in cold climates? EPDM itself does not provide insulation, so yes, a proper insulation layer is essential in any cold-climate roof build-up. The good news is that EPDM works well with all common insulation types, including PIR, EPS, and mineral wool boards. The membrane sits on top of the insulation, protecting it from moisture and weather exposure. Building regulations will dictate minimum U-values for your area, and your insulation thickness should be calculated accordingly. QBM can supply both EPDM and compatible insulation products for a complete system. What is the best time of year to install EPDM roofing? Spring and autumn tend to be the most popular seasons for flat roofing projects in the UK, as temperatures are moderate and rainfall is often less persistent than in winter. That said, EPDM can be installed year-round with proper planning. Summer heat can make adhesives flash off too quickly, while winter cold can slow curing times. Many experienced contractors find that mild, dry days in early autumn offer the ideal balance of temperature and working conditions for laying EPDM systems. Source Your Cold-Climate Roofing Materials from QBM Whether you are planning a new flat roof build or a winter replacement project, QBM supplies a full range of EPDM roofing materials, kits, and accessories suited to cold-climate applications. Get in touch with the QBM team to discuss your project requirements and find the right products for the job. We are here to help you source exactly what you need, whatever the season.
- Can EPDM Be Laid Over Existing Roof Coverings? When Overlay Installation Works
One of the most common questions we hear from contractors and property owners in Ireland is straightforward enough: can EPDM be laid over existing roof coverings? The answer is not quite a simple yes or no, but in many situations, it is possible, and it can save a significant amount of time, labour, and cost. This guide walks through when overlaying EPDM makes sense, when you should strip back to the deck instead, and what preparation steps matter most. Whether you are dealing with a worn-out felt roof on a domestic extension or an ageing commercial flat roofing system, the principles are largely the same. Can EPDM Be Installed Over Existing Roof Coverings? Quick Answer EPDM roofing can often be installed over existing coverings such as bonded felt, concrete decks, plywood, OSB boards, and some GRP surfaces, provided the substrate is dry, stable, and securely attached. However, overlay installation is not recommended where moisture is trapped beneath layers, where multiple coverings already exist, or where the deck shows signs of structural deterioration. Systems such as Firestone RubberGard EPDM and Carlisle Sure-Seal membranes are frequently specified for overlay installations where the existing substrate meets manufacturer preparation requirements. Elevate UltraPly EPDM is another widely recognised option for refurbishment projects across Ireland and the UK. When EPDM Can Be Laid Over an Existing Roof The good news is that EPDM can generally be laid over a range of existing roof coverings, provided certain conditions are met. The membrane is flexible, lightweight, and bonds well to various substrates, which makes it a strong candidate for overlay roofing projects. Here are the most common scenarios where laying EPDM over an existing material works well: Felt roofing: Probably the most frequent overlay situation in Ireland. If the existing felt is still firmly bonded to the deck, reasonably smooth, and free of major blistering or soft spots, EPDM can go right on top. Minor imperfections are usually acceptable, as the rubber membrane is forgiving enough to conform to slight irregularities. Mineral felt or torch-on systems: Similar to standard felt, these can serve as a suitable substrate for EPDM provided the surface is stable and well-adhered. Loose or delaminated areas need attention first. Concrete decks: On commercial buildings with concrete roof decks, EPDM can be applied directly, often with a fleece-backed membrane or a separate protection layer to prevent abrasion. Plywood or OSB boards: If the existing timber deck is sound and level, EPDM bonds effectively with the right contact adhesive. This is common on shed roofs and smaller domestic structures. There is a general rule of thumb here: if the existing roof covering is flat, stable, clean, and firmly attached, EPDM over that surface is usually a viable option. Where things get complicated is when the existing material is in poor condition. Overlay installations using EPDM membranes from manufacturers such as Firestone Building Products, Carlisle SynTec Systems, and Elevate are widely used across refurbishment projects in Ireland and the UK where existing felt or timber substrates remain structurally sound. When Overlaying EPDM Saves the Most Time and Cost Not every project benefits equally from an overlay approach. The biggest time and cost savings tend to show up in specific situations: Single-layer felt roofs on domestic extensions Garage and shed roofs where the timber deck is still solid Refurbishment projects that do not require an insulation upgrade Structurally sound timber decks with a well-bonded existing covering Smaller flat roofing jobs where skip hire and waste disposal would add disproportionate cost For these types of projects, overlay is often the most practical route. The EPDM goes down quickly, the existing covering acts as an additional layer of protection, and the disruption to the building is kept to a minimum. Substrates You Should NOT Overlay EPDM On Just as important as knowing when overlay works is knowing when it does not. There are certain surfaces that should never be covered over, regardless of how tempting it might be to save time: Saturated insulation boards: Trapped moisture will cause long-term problems beneath the new membrane, including mould growth and accelerated deck deterioration. Asbestos-containing coverings: These must be handled by licensed specialists and removed in accordance with Irish regulations. Never overlay on top of suspected asbestos. Unstable bitumen layers: If the bitumen is crumbling, cracking, or lifting in large sections, it will not provide a reliable base for adhesive bonding. Failing chipboard decks: Chipboard swells and breaks down when exposed to moisture. If there is any sign of softness or delamination, replacement is the only safe option. Heavily blistered torch-on membranes: A few minor blisters can be dealt with, but widespread blistering indicates trapped moisture or adhesion failure, neither of which should be covered over. If any of these conditions are present, all existing roof covering is stripped back to the deck, and the substrate is assessed and repaired before the EPDM installation begins. Structural Checks Before Overlaying EPDM Before committing to an overlay, there are a few structural and regulatory considerations that should not be overlooked. This is especially true for commercial buildings and older domestic properties where the roof structure may not have been inspected in years. Roof Loading Capacity Adding an EPDM membrane on top of existing coverings increases the total roof load, even if only slightly. EPDM is a lightweight material, but the cumulative weight of multiple layers matters, particularly on older timber structures. Membrane Thickness Approximate Weight 1.14 mm ~1.4 kg/m² 1.52 mm ~1.8 kg/m² These figures are for the EPDM alone. Factor in the weight of the existing covering, adhesive, and any additional trims or flashings when assessing total load. Building Regulations and Compliance In Ireland, roofing projects may need to comply with Part L of the Building Regulations, particularly where thermal performance is a consideration. If an overlay project triggers a requirement for insulation improvements, the entire roof build-up may need to be reconsidered. Key areas to check: Vapour control layers: Overlaying without addressing vapour management can lead to interstitial condensation, especially on warm-deck roof constructions. Ventilation requirements: Cold-deck roofs need adequate cross-ventilation to prevent moisture build-up. Adding a new membrane on top without ventilation consideration can trap damp air within the structure. Fall minimums: A minimum fall of 1:80 is generally recommended for flat roofing to prevent ponding water. If the existing roof has insufficient falls, an overlay alone will not fix the issue. Condensation control: Where a roof is being refurbished, a condensation risk assessment is good practice, particularly on commercial or multi-use buildings. Moisture Risks When Overlaying EPDM Moisture is probably the single biggest risk factor in any overlay project. If water is trapped beneath the new membrane, it has nowhere to go. Over time, that trapped moisture can cause: Interstitial condensation within the roof structure Vapour migration through the deck, leading to interior damp issues Insulation saturation, which dramatically reduces thermal performance Deck rot or corrosion, depending on the substrate material For commercial roofs where the existing build-up is unknown, core sampling is a worthwhile step. A small section is cut through all the layers to assess their condition, moisture content, and overall integrity. It takes minutes and can save thousands in failed roofing repair costs. On domestic projects, a careful visual inspection combined with a moisture meter reading is usually sufficient. If there is any doubt, stripping back a small test area can reveal what is happening beneath the surface. Preparing an Existing Roof for EPDM Overlay Assuming the existing roof covering is in acceptable condition, preparation is the most important step in the process. Rushing this part is perhaps the single biggest cause of overlay failures. The membrane itself is not usually the problem; it is what sits beneath it. Surface Preparation Checklist Remove loose debris and dirt. Sweep or blow the entire surface clean. Dust, grit, and loose aggregate will prevent the adhesive from bonding properly. Cut away any blistered or lifted sections. Small blisters can be sliced open, pressed flat, and sealed. Larger ones may need to be cut out and patched with a compatible material. Check for moisture. Damp areas beneath the existing material will cause problems. If there is any sign of trapped water, those sections should be opened up, dried out, or replaced before the EPDM goes down. Ensure the surface is level. Significant dips, ridges, or raised seam edges can telegraph through the new rubber roofing membrane over time. Sand down high spots, fill low areas, and pay particular attention to the membrane edge details and perimeter trims. Apply a suitable primer if needed. Some EPDM adhesives require a primer coat on the existing surface to improve bond strength. Check the product data sheet for the specific adhesive you are using. Use the correct contact adhesive. Not all adhesives are compatible with every substrate. EPDM membranes need a contact adhesive that is specifically designed for rubber roofing. Using the wrong product can result in poor adhesion or, worse, chemical damage to the membrane. A Note on Adhesives Contact adhesives are the backbone of most bonded EPDM installations. They work by coating both the membrane and the substrate, allowing the solvent to flash off, and then pressing the two surfaces together for an instant bond. The quality of the adhesive matters enormously, and it is one area where cheaper products can let you down. QBM stocks a range of EPDM-compatible adhesives and primers from trusted manufacturers. If you are unsure which product suits your particular overlay situation, the team can advise based on the existing material and project requirements. Warranty Considerations for Overlay Installations Many manufacturers, including Firestone, Carlisle, and Elevate, permit overlay installations where the existing substrate passes inspection criteria for dryness, attachment strength, and surface condition. Warranty eligibility typically depends on documented substrate assessment before installation. It is worth checking the specific warranty terms for the EPDM membrane you plan to use. Some products carry full system warranties for overlay applications; others may offer limited coverage. QBM can help clarify which products carry overlay-compatible warranty support and what documentation you will need to provide. Overlay vs Full Replacement: A Quick Comparison It can be helpful to see the key differences side by side, particularly if you are weighing up which approach makes more sense for your project. Factor EPDM Overlay Full Strip and Replace Cost Lower; less labour and waste disposal Higher; removal and disposal costs add up Time Faster; fewer preparation steps Slower; stripping adds a full day or more Deck Inspection Limited; existing layers obscure the deck Full; every issue is visible and addressable Suitability Best when existing covering is sound Required when existing material is degraded Longevity Good, if substrate is properly prepared Excellent; clean base supports longest lifespan Weight Adds slightly to the roof load Reduces load by removing old layers Common Use Cases Shed roofs, domestic extensions, garages Older commercial buildings, multi-layer roofs Neither option is universally better. An overlay is perfectly fine for a well-maintained flat roof that just needs a new weatherproof surface. A full roofing repair and replacement is the right call when the existing structure needs attention. Getting the Best Results From an EPDM Overlay A few practical tips that are worth keeping in mind, particularly for anyone sourcing materials and planning an overlay project in Ireland: Order the right kit. EPDM roofing kits from QBM include the membrane, adhesives, trims, and accessories sized for the specific roof area. Getting the right kit avoids waste and ensures all the components are compatible. Think about drainage. Laying EPDM over an existing roof does not change the falls or drainage pattern. If ponding was a problem before, it will still be a problem after the overlay. Address drainage issues as part of the project. Detail the edges carefully. The membrane edge is where most failures start. Use proper edge trims, and make sure the adhesive coverage extends fully to the perimeter. Shortcuts at the edges almost always come back to cause issues. Consider the weather. EPDM installation works best in dry, mild conditions. Adhesives need time to flash off and cure, and damp surfaces will compromise the bond. In Ireland's climate, checking the forecast before starting is just common sense. Check QBM's EPDM resources. Product data sheets, installation guides, and technical support are all available through QBM. These resources are particularly useful if you are working with EPDM for the first time or dealing with an unusual substrate. Related Topics You Might Find Useful If you are researching EPDM overlay options, these related guides may also be worth a look: EPDM lifespan and durability expectations EPDM vs TPO roofing comparison Cold-weather EPDM installation guidance Flat roof insulation upgrades EPDM maintenance and inspection checklists Frequently Asked Questions Can EPDM be laid over old torch-on felt in Ireland? Yes, EPDM can be laid over torch-on felt as long as the existing surface is firmly bonded, clean, and free of significant blistering or delamination. The torch-on felt acts as a stable substrate for the new rubber roofing membrane. Minor surface irregularities are generally acceptable, but loose sections should be cut out and repaired beforehand. A compatible contact adhesive is essential for a reliable bond between the EPDM and the existing felt surface. QBM stocks suitable products for this application. Does overlaying EPDM void any manufacturer warranties? It depends on the specific manufacturer and their warranty terms. Some EPDM membrane suppliers, including Firestone and Carlisle, will warrant overlay installations provided the existing roof covering meets certain conditions for firmness, flatness, and dryness. Others may require a full strip back for their warranty to apply. Always check the warranty documentation before starting, and keep records of the existing roof condition. QBM can help clarify warranty requirements for the specific EPDM products they supply. Is it cheaper to overlay or fully replace a flat roof with EPDM? Overlaying is almost always cheaper than a full strip and replacement, primarily because you avoid the labour cost of removing the old material and the expense of skip hire and waste disposal. The EPDM membrane, adhesives, and kits cost roughly the same either way. However, if the existing roof needs significant repair work before an overlay, those extra preparation costs can close the gap. For roofs in reasonable condition, overlay typically saves 20% to 40% on the total project cost. Can I lay EPDM over a fibreglass (GRP) roof? Laying EPDM over GRP is possible but requires careful preparation. The fibreglass surface needs to be lightly sanded to create a key for the adhesive, and any flaking or cracked areas must be repaired first. A primer coat is usually recommended to improve bond strength on the smooth GRP surface. This type of overlay is less common than felt-to-EPDM, but it works well when the existing fibreglass is structurally sound. Contact QBM for guidance on the right adhesive and primer combination. Source Your EPDM Overlay Materials From QBM Planning an EPDM overlay project? QBM supplies a full range of rubber roofing membranes, adhesives, kits, and accessories for both overlay and new-build flat roofing applications across Ireland. Contact the QBM team today to discuss your project and find the right products for a reliable, long-lasting result.
- How To Install EPDM Roofing: Complete Step-by-Step Guide for Flat Roofs
Whether you are tackling a shed roof, a garage, a domestic extension, or a larger commercial project, learning how to install EPDM roofing is one of those skills that pays for itself many times over. EPDM rubber is one of the most forgiving and reliable flat roofing materials available, and the installation process, while it does require care and attention, is well within reach of competent DIYers and professional contractors alike. This guide covers the full process from start to finish: preparing the roof deck, choosing the right installation methods, applying adhesive, positioning the rubber membrane, fitting trims and flashing, and finishing the details that make the difference between a roof that lasts five years and one that lasts thirty. QBM supplies a full range of EPDM roofing products, kits, and accessories across Ireland, so if you need materials for any stage of the process, the team can help you source the right items for your project. How To Install EPDM Roofing: Quick Step-by-Step Summary Installing EPDM roofing involves preparing a clean, dry deck, dry-fitting the membrane, applying contact adhesive to both surfaces, allowing proper flash-off time, bonding the membrane from the centre outward, sealing edges and upstands, and finishing seams and penetrations with flashing tape or pre-formed accessories. Installation procedures described here closely follow manufacturer systems such as Firestone RubberGard EPDM and Carlisle Sure-Seal, which use similar deck-preparation and contact-adhesive bonding methods. FlexiProof EPDM and Elevate UltraPly EPDM follow comparable processes, though always check the specific product data sheets for any manufacturer-specific requirements. Before You Start: Tools, Materials, and Planning Getting organised before you begin is probably the most underrated part of any roofing project. It is tempting to jump straight into laying sheets, but a bit of planning upfront will save time, reduce waste, and produce a much better result. What You Will Need Here is a practical list of tools and materials for a standard bonded EPDM installation: Tools: Tape measure and chalk line Sharp utility knife with spare blades 9-inch paint roller and roller tray Silicone hand roller (for seam pressing) Stiff-bristled broom or leaf blower Pencil or marker for marking positions Scissors (for trimming smaller details) Caulking gun Materials: EPDM rubber membrane (sized to your roof, with overhang allowance) Contact adhesive (solvent-based or water-based adhesive, depending on conditions) Seam tape or seam adhesive (if joining multiple sheets) Drip edge trims Wall trim (for abutment details) Flashing tape or pre-formed flashing corners Lap sealant Primer (if required for your substrate) Termination bar (for mechanical fixing at walls) QBM stocks EPDM roofing kits that bundle the membrane with matching adhesives, trims, and accessories. For smaller projects like shed roofs, a kit is often the simplest way to make sure you have everything in one delivery. Measuring and Ordering the Membrane EPDM rubber sheets are available in a range of widths and lengths. The goal is to cover the entire roof decking area in a single piece wherever possible. Seams are not the end of the world, but fewer seams means fewer potential points of failure. Measure the roof at its longest and widest points, then add at least 150 mm of overhang on all sides. More is generally better here; you can always trim excess, but you cannot stretch a membrane that is too short. For larger roofs that require multiple panels, plan the seam positions carefully. Seams should run with the fall of the roof (not across it) and should be positioned away from areas where water tends to pool. Roof Size Recommended Approach Up to 6m x 4m Single sheet, no seams needed 6m x 4m to 10m x 6m Single sheet if available; otherwise one seam Over 10m x 6m Multiple panels with planned seam layout Irregular shapes Order oversized and trim to fit on site Common Installation Time Estimates One of the things people always want to know is how long the job will take. It varies, obviously, but here are some rough figures based on typical projects: Roof Type Typical Install Time Shed roof 2 to 4 hours Single garage 1 day Domestic extension 1 to 2 days Commercial roof Multi-day (depending on size) These assume decent weather, a prepared deck, and all materials on site. Add time for deck repairs, insulation work, or complex penetrations. Substrate Compatibility for Bonded EPDM Installation Not every deck surface is suited to every installation method. Here is a quick reference for the most common substrates you will encounter in Ireland: Substrate Suitable for Bonded Install? Notes OSB board Yes Most common domestic substrate Plywood Yes Excellent bonding surface PIR insulation Yes Requires fleece-backed membrane Concrete Yes Primer required before adhesive Metal deck Usually mechanical fix Bonding rarely practical Existing felt (sound) Yes Must be firmly adhered and dry If you are working on a substrate not listed here, contact QBM for advice on the right installation approach and compatible products. Step 1: Preparing the Roof Deck Deck preparation is, without exaggeration, the most important stage of any EPDM installation. A clean, smooth, dry deck is the foundation of a successful rubber roof. Skip this step or rush it, and the adhesive will not bond properly, which means the membrane will lift, bubble, or wrinkle over time. Inspecting the Substrate Start by checking the condition of the existing deck. For new-build projects, this is usually straightforward; the timber panels or plywood boards will be fresh and level. For refurbishment work, things can be more complicated. Look for: Soft or rotten sections in timber decking Protruding nail heads or screw points Gaps between boards that could telegraph through the membrane Moisture damage, staining, or signs of previous leaks Uneven areas, raised edges, or warped panels Any issues need to be addressed before the EPDM goes down. Replace damaged sections, hammer in protruding fixings, and fill gaps with a suitable filler. The surface should be flat, firm, and free of anything that could puncture or deform the rubber membrane once it is in place. Cleaning the Surface Once the deck is structurally sound, give it a thorough clean. Use a stiff broom to sweep away dust, debris, loose chippings, and anything else sitting on the surface. Even small pieces of grit can create noticeable bumps under a thin rubber membrane. If the deck has been exposed to weather, allow it to dry completely before moving on. Applying adhesive to a damp substrate is one of the most common installation mistakes, and it almost always leads to bonding failure. Installing Drip Edge Trims Before laying the membrane, fit your drip edge trims to the perimeter of the roof. These L-shaped metal profiles serve two purposes: they create a clean, finished edge, and they direct rainwater into the gutter rather than allowing it to run down the fascia. Drip trims are typically fixed to the deck with screws or nails at regular intervals, usually every 150 to 200 mm. Make sure the drip edge overlaps the gutter slightly so water flows in the right direction. At corners, you have two options: mitre the trims for a neat joint, or use pre-formed corner pieces. Either works, though the corner pieces tend to be quicker and produce a more reliable seal. A common question here: should the membrane go over or under the drip trim? The answer depends on the system you are using. Most EPDM systems have the membrane bonded on top of the drip edge, with the rubber wrapping over the trim and adhering to its face. Check the specific product instructions from QBM, as this detail varies between manufacturers. Step 2: Understanding EPDM Installation Methods There are three main ways to install an EPDM membrane, and the right choice depends on the roof size, substrate type, and project requirements. Fully Adhered (Bonded) Installation This is by far the most common method for domestic and smaller commercial projects in Ireland. The membrane is glued to the entire roof deck using contact adhesive, creating a fully adhered bond across the complete surface. Best for: Shed roofs, garages, extensions, porches, and small to medium commercial roofs. Advantages: No mechanical fixings penetrating the membrane Clean, flat appearance with no visible fasteners Strong wind uplift resistance when properly bonded Works well on timber decks, plywood, and OSB Mechanically Attached Installation For larger commercial roofing systems, the EPDM rubber sheets can be mechanically attached to the deck using fasteners and plates. The membrane is secured at the seams and perimeter, with the central sections left unbonded. Best for: Large commercial and industrial roofs, metal deck substrates, and projects where adhesive application is impractical. Advantages: Faster installation on large roof areas Less dependent on weather conditions during application Suitable for substrates where adhesive bonding is difficult Ballasted Installation In this method, the EPDM is laid loose over the roof and held in place by a layer of ballast, typically river-washed gravel or paving slabs. It is less common in Ireland but occasionally used on commercial buildings with appropriate structural capacity. Best for: Large flat roofs with adequate load-bearing capacity. Most EPDM installation systems supplied by manufacturers such as Firestone Building Products, Carlisle SynTec Systems, and Elevate follow similar bonded, mechanically attached, or ballasted installation principles depending on roof size and substrate type. This guide focuses primarily on the fully adhered method, as it covers the vast majority of residential and small commercial projects. Step 3: Applying the Adhesive and Laying the Membrane This is where things get real. Adhesive application is the heart of the installation, and it requires patience, good timing, and a steady hand. Rushing through this stage is tempting, especially on a larger roof, but taking your time here pays off enormously. Dry-Fitting the Membrane First Before opening a tin of adhesive, roll out the EPDM rubber membrane across the roof and let it sit for at least 30 minutes. This allows the material to relax, flatten, and adjust to the ambient temperature. EPDM has a memory; if it has been rolled tightly in packaging, it will want to curl back on itself until it has had time to settle. Position the sheet so that you have roughly equal overhang on all sides. If you are working with a single piece, centre it carefully. For multiple panels, lay them out with the planned overlap at each seam (typically 75 to 100 mm). Once you are happy with the position, fold the membrane back on itself so that half of the roof deck is exposed. You will apply adhesive to this half first, then repeat the process for the second half. Applying Contact Adhesive to the Deck Using a 9-inch roller, apply an even coat of contact adhesive to the exposed roof deck. Work in sections, rolling in one consistent direction. The adhesive should cover the entire surface without pooling or leaving dry patches. Adhesive Coverage Rates Knowing how much adhesive to order is important, and running out mid-project is something you want to avoid. Here are typical coverage figures: Adhesive Type Approximate Coverage Solvent-based contact adhesive 4 to 5 m² per litre Water-based adhesive 6 to 8 m² per litre Bonding adhesive (for insulation) Varies by system; check data sheet A few important notes on choosing between types: Solvent-based contact adhesive is the standard choice for most EPDM installations. It bonds quickly and works well in a range of temperatures, though it does produce strong fumes, so ventilation matters. Water-based adhesive is an alternative that produces fewer fumes and is easier to clean up. It takes longer to flash off and is more sensitive to cold or damp conditions, but it works well in warmer, dry weather. Applying Contact Adhesive to the Membrane After coating the deck, apply the same adhesive to the underside of the folded-back EPDM membrane. Use the roller to spread an even coat, working from the fold line outward toward the edges. Both surfaces, the deck and the membrane, need to be coated. This is how contact adhesive works: it bonds to itself when the two coated surfaces are pressed together. The Flash-Off Period Here is where patience becomes essential. Once both surfaces are coated, you need to wait for the adhesive to flash off. This means the solvents evaporate until the adhesive becomes tacky to the touch but no longer wet. It should feel sticky without transferring onto your finger. Conditions Approximate Flash-Off Time Warm, dry (18°C+) 15 to 25 minutes Mild (10 to 18°C) 25 to 40 minutes Cool (5 to 10°C) 40 to 60 minutes Below 5°C Not recommended for most adhesives Do not rush this. Laying the membrane onto adhesive that is still wet will trap solvents beneath the rubber, causing bubbles and poor adhesion. Equally, leaving it too long allows the adhesive to dry past its bonding window. Temperature Thresholds for EPDM Installation Temperature affects every stage of the process. Here is a quick reference: Installation Factor Recommended Range Ideal install temperature 10°C to 25°C Minimum for solvent adhesive 5°C Minimum for water-based adhesive 8 to 10°C Avoid installation above 30°C In Ireland, mild spring and autumn days tend to offer the best balance of temperature and working time. Very cold or very hot days create problems at both ends of the spectrum. Laying the Membrane Down Once the adhesive is properly flashed off on both surfaces, carefully lower the membrane onto the deck. Start from the fold line and work outward, pressing the rubber down as you go. Use a clean, dry push broom or a hand roller to smooth out the surface and remove any trapped air. Work slowly. Once the two adhesive-coated surfaces make contact, the bond is essentially instant. You cannot reposition the membrane after it touches down, so accuracy during the dry-fit stage is critical. After the first half is bonded, fold the second half back and repeat the entire process: coat the deck, coat the membrane, wait for flash-off, and lay it down. Rolling and Pressing After the full sheet is laid, go over the entire surface with a silicone hand roller. Pay particular attention to the edges, corners, and any areas around penetrations. This step removes air pockets and ensures full contact between the membrane and the adhesive. The perimeter of the roof, where the EPDM meets the drip trims and wall abutments, needs especially firm pressing. These are the areas most likely to lift if the bond is not solid. Step 4: Trimming, Flashing, and Finishing Details With the main membrane bonded to the deck, the next stage is all about the details. And honestly, the details are what separate a good EPDM roof from a great one. The flat surface in the middle of the roof is the easy part; it is the edges, upstands, gutter lines, and penetrations that require the most care. Trimming the Membrane Edges Using a sharp utility knife, trim the excess EPDM around the perimeter of the roof. Leave enough material to wrap over the drip edge trims, typically 50 to 75 mm on the face of the trim. The rubber should fold neatly over the metal and adhere to its vertical face with the same contact adhesive. Take your time with this step. A clean, straight trim line makes the finished roof look professional. Ragged or uneven cuts are visible from ground level and suggest a rushed job, even if the underlying bond is perfectly sound. Wall Abutment Details Where the roof meets a wall, whether it is the main house wall, a parapet, or cladding, the EPDM needs to run up the vertical surface by at least 150 mm. This upstand prevents water from getting behind the membrane. The process: Apply contact adhesive to both the wall surface and the back of the EPDM Wait for proper flash-off Press the membrane firmly onto the wall Fix a wall trim or termination bar at the top of the upstand to hold the membrane in place Seal the top edge of the trim with a bead of lap sealant The wall trim creates a mechanical fixing point and a weather-tight seal at the top of the upstand. Without it, the membrane can peel away from the wall over time, especially during strong winds or heavy rain. If the wall surface is rendered, make sure the render is firmly attached before applying adhesive. Loose render will pull away and take the membrane with it. Corner Details Corners, both internal and external, are where most leaks originate on flat roofs. The EPDM needs to be neatly folded or patched to maintain a watertight seal at every change of direction. For external corners (where the roof meets two walls), the approach is to fold the membrane neatly around the corner, cutting a relief where necessary to allow the rubber to lie flat without bunching. Apply extra adhesive and use a roller to press the material firmly into the junction. For internal corners (where two upstands meet), pre-formed EPDM corner patches are the easiest solution. These moulded accessories are designed to sit into the corner and overlap the surrounding membrane, providing a reliable seal without complex folding. Pipe and Vent Penetrations Any pipe, vent, or other penetration through the roof needs a dedicated seal. EPDM pipe boots, sometimes called top hats, are the standard solution. These pre-formed rubber sleeves fit around the pipe and bond to the surrounding membrane with adhesive or flashing tape. The key points: Clean the pipe and surrounding membrane thoroughly before applying any sealant or adhesive Apply contact adhesive to both the pipe boot and the membrane surface Press the boot firmly in place and roll the seams with a silicone roller Apply lap sealant around the top of the boot where it meets the pipe For larger or unusually shaped penetrations, flashing tape can be used to create a custom seal. This self-adhesive tape conforms to irregular shapes and bonds well to EPDM rubber, though it works best as a secondary seal rather than the primary waterproofing layer. Gutter Line Finishing Where the EPDM meets the gutter, the membrane should wrap over the drip edge and terminate cleanly. The drip should direct water into the gutter channel without allowing it to run back underneath the trim. Check that: The EPDM is firmly bonded to the face of the drip trim There are no gaps or lifted sections along the gutter line The drip edge overhangs the gutter by 25 to 40 mm Water flows freely from the roof surface into the gutter without pooling at the edge If the existing gutter is in poor condition, it is worth replacing it as part of the project. A new rubber roof paired with a failing gutter is a frustrating combination, and the cost of replacement is relatively minor compared to the roofing work itself. Step 5: Seam Joining (For Multi-Panel Installations) If your roof requires more than one EPDM sheet, the panels need to be joined with a watertight seam. This is a critical step, and it needs to be done correctly. A failed seam is the most common source of leaks on multi-panel EPDM roofing systems. How to Join EPDM Sheets Overlap the two sheets by 75 to 100 mm, with the upper sheet (closest to the ridge or high point) sitting on top of the lower one Clean the overlap area on both sheets with EPDM membrane cleaner or the solvent recommended by the manufacturer Apply seam adhesive or position seam tape within the overlap zone Press the sheets together firmly, working from one end to the other to push out air bubbles Roll the entire seam with a silicone hand roller, applying firm, consistent pressure Apply a bead of lap sealant along the exposed edge of the top sheet to seal the seam termination Seam Tips Never apply seam tape or adhesive in wet or damp conditions Keep the seam area clean; dust and debris will compromise the bond Work in manageable sections rather than trying to seal the entire seam length at once If using seam tape, peel the backing gradually as you press the sheets together; do not remove all the backing at once A well-executed seam should be virtually invisible once complete, with no wrinkles, air pockets, or gaps along its length. Safety Considerations When Installing EPDM Roofing Safety is something that can get overlooked on smaller domestic jobs, but it matters on every project, regardless of size. A few things to keep in mind: Working at Height Use a properly secured ladder positioned on stable, level ground at a 75-degree angle On roofs above 2 metres, fall protection should be in place; this includes edge protection, harnesses, or scaffold towers depending on the project Never work on a wet or icy roof surface If the roof has no parapet or edge upstand, temporary edge protection is strongly recommended Solvent Adhesive Ventilation Solvent-based contact adhesives produce strong fumes that can cause dizziness, headaches, and respiratory irritation. When working in enclosed or semi-enclosed spaces: Ensure adequate airflow across the work area Wear a respirator rated for organic vapour exposure Take regular breaks away from the adhesive fumes Store open tins away from ignition sources; solvent adhesives are highly flammable Personal Protective Equipment (PPE) At a minimum, wear: Safety footwear with non-slip soles Protective gloves (nitrile or similar, to avoid skin contact with adhesives and primers) Eye protection when cutting membrane or applying solvents Knee pads if spending extended time on the roof surface Manual Handling EPDM roofing sheets are heavier than they look, particularly larger rolls. A 6m x 4m membrane at 1.5 mm thickness weighs roughly 43 kg. Larger sheets for commercial projects can weigh considerably more. Always have at least two people available for lifting and positioning the membrane, and consider how you will get the roll onto the roof safely. Common Mistakes to Avoid Even experienced installers make errors from time to time. Here are the most frequent ones: Applying adhesive in damp conditions. Moisture on the deck or the membrane will prevent proper bonding. Wait for dry weather. Not allowing enough flash-off time. Laying the membrane onto wet adhesive traps solvents and creates bubbles. Skipping the dry fit. Cutting the membrane to size without positioning it first often leads to costly mistakes. Using the wrong adhesive. Not all contact adhesives are compatible with EPDM rubber. Always use products specified for rubber roofing. Neglecting edge details. The perimeter, upstands, and penetrations are where most failures occur. Spend extra time on these areas. Working in extreme temperatures. Very cold conditions slow adhesive curing; very hot conditions can cause it to flash off too quickly. Mild, dry days are ideal. Stretching the membrane. EPDM rubber has some stretch, but pulling it tight during installation creates stress that can lead to shrinkage over time. Lay it with slight slack. When Professional Installation Is Recommended EPDM is very much a DIY-friendly material for straightforward projects, but there are situations where calling in a professional roofer is the sensible choice: Multi-panel seam layouts on larger roofs, where seam integrity is critical Parapet roofs with complex upstand and coping details Multiple penetrations such as vents, skylights, and soil pipes in close proximity Commercial deck substrates that require mechanical attachment systems High wind uplift zones where additional fixing calculations are needed Roofs with limited access or significant height, where safety risks are greater There is no shame in recognising when a project has moved beyond comfortable DIY territory. A poorly installed EPDM roof will cost more to fix than a professionally fitted one would have cost in the first place. Frequently Asked Questions Can I install EPDM roofing on a shed roof myself? Yes, shed roofs are one of the most common DIY EPDM projects. The smaller surface area makes handling the membrane much easier, and most shed roof installations can be completed in a single day. QBM supplies EPDM roofing kits sized specifically for typical shed dimensions, which include the membrane, contact adhesive, and basic accessories. The key is thorough deck preparation and patience during the adhesive application stage. If the timber panels are sound and dry, a shed roof is an ideal first EPDM project. How long does EPDM rubber roofing last once installed? A properly installed EPDM rubber roof can last between 25 and 50 years, depending on the membrane thickness, quality of installation, and local weather exposure. Thicker membranes (1.5 mm) generally outlast thinner ones (1.14 mm) by a noticeable margin. Regular inspection and basic maintenance, such as clearing debris from gutters and checking seam integrity, will help extend the lifespan further. EPDM is one of the longest-lasting flat roofing materials currently available, with proven installations from the 1970s still performing well today. What temperature is best for installing EPDM? The ideal temperature range for applying contact adhesive and laying EPDM is between 10°C and 25°C. Below 5°C, most solvent-based adhesives become sluggish and may not cure properly, while water-based adhesive products require even warmer conditions, typically above 8°C. Extremely hot days (above 30°C) can cause adhesive to flash off too quickly, reducing working time. In Ireland, mild spring and autumn days tend to offer the best conditions. Always check the adhesive manufacturer's temperature recommendations before starting. Do I need to prime the deck before applying EPDM adhesive? It depends on the substrate material and the specific adhesive being used. Some EPDM systems require a primer on porous substrates like OSB or plywood to improve bond strength and reduce adhesive absorption. Others are designed to work directly on clean timber without a separate priming step. Concrete and masonry surfaces almost always need a primer. Check the product data sheets for the adhesive and membrane you are using; QBM can advise on which products require priming for your particular deck type. Can EPDM be installed over cladding or profiled surfaces? EPDM is not typically bonded directly to profiled cladding or corrugated surfaces, as the uneven profile prevents consistent adhesive contact. However, a flat overlay board can be fixed on top of the cladding to create a smooth substrate, and the EPDM membrane can then be bonded to that surface. This approach is sometimes used on older commercial or agricultural buildings where the existing cladding is being retained but the roof needs a new weatherproof covering. Mechanical attachment systems are an alternative for profiled decks. Get Your EPDM Roofing Materials From QBM Ready to start your EPDM installation? QBM supplies a complete range of rubber roofing sheets, membranes, contact adhesives, drip trims, flashing accessories, and full installation kits for projects of every size across Ireland. Get in touch with the QBM team to discuss your requirements. Whether you need a single shed roof kit or materials for a larger commercial project, we are here to help you find the right products.
- EPDM vs Neoprene Rubber: Differences, Uses, Cost and Weather Resistance Compared
When people start comparing EPDM vs neoprene, the conversation usually begins with a simple question: which one is better? The honest answer is that it depends entirely on what you need the material to do. These two synthetic rubbers share some surface similarities, but their chemical makeup, strengths, and ideal applications are quite different. This guide breaks down the practical differences between EPDM and neoprene, covering weather resistance, chemical tolerance, temperature range, cost, and the real-world applications where each material performs best. If you are sourcing rubber roofing materials in Ireland, the distinction matters more than you might think. Quick Comparison Summary EPDM rubber performs best in outdoor environments exposed to sunlight, ozone, and temperature extremes, making it the preferred material for roofing membranes and weather seals. Neoprene rubber is better suited to industrial applications involving oils, fuels, and moderate chemical exposure, where its hydrocarbon resistance and flame-retardant properties provide advantages. Under ASTM D1418, EPDM is classified as an ethylene-propylene diene rubber, while neoprene (CR rubber) falls under chloroprene elastomers with stronger hydrocarbon resistance. For roofing specifically, EPDM membranes are tested to EN 13956, the European standard for polymeric roof waterproofing membranes. Understanding the Two Compounds Both EPDM and neoprene are synthetic rubbers, but they are built from very different chemical foundations. That chemistry is what drives their performance characteristics, and it is worth understanding, at least at a basic level, before making a decision. What Is EPDM? EPDM, or ethylene propylene diene monomer, is a synthetic rubber known for its outstanding resistance to weather, UV radiation, and ozone. EPDM is widely used in roofing, automotive seals, pond liners, and outdoor environments where long-term exposure to the elements is a given. The material is available in sheet form, as a sponge or foam profile, and in custom rubber molding configurations for industrial use. For roofing applications specifically, EPDM rubber is supplied in large membrane sheets that can cover entire flat roof surfaces in a single piece. EPDM membranes from manufacturers such as Firestone Building Products, Carlisle SynTec Systems, and Elevate are widely used across Ireland and the UK. What Is Neoprene? Neoprene, also known as polychloroprene, is a synthetic rubber developed originally by DuPont in the 1930s. Neoprene is valued for its versatility, particularly its resistance to oils, fuels, and certain chemicals. It also handles moderate heat well and offers good abrasion resistance. You will find neoprene in wetsuits, industrial gaskets, cable jacketing, neoprene foam padding, and various protective applications. Neoprene rubber sheets are commonly supplied by industrial elastomer manufacturers such as Trelleborg and Saint-Gobain Performance Plastics. Neoprene is tougher than EPDM in some respects, but it comes with trade-offs that make it less suitable for certain outdoor uses. Where Each Material Performs Best The simplest way to think about these two rubbers is this: EPDM excels in outdoor, weather-exposed applications, while neoprene is stronger where oil, fuel, or flame resistance matters. There is some overlap, naturally, but that broad distinction holds true for most practical purposes. EPDM's Strengths Superior resistance to UV radiation, ozone, and weather degradation Operates across a wide temperature range, typically from -45°C to +150°C Excellent flexibility in cold conditions Long service life in outdoor environments (25 to 50 years for roofing) Less expensive than neoprene for most applications EPDM provides strong moisture and steam resistance Classified under ASTM D2000 for rubber material specification Neoprene's Strengths Good resistance to oils, fuels, and petroleum-based fluids Better flame resistance than EPDM; neoprene is inherently flame-retardant and often meets UL 94 HB classifications depending on formulation Solid abrasion resistance for industrial applications Moderate chemical resistance across a range of compounds Available as foam, sponge, and solid sheet for varied uses Performs well in moderate heat applications EPDM is the clear winner for roofing, outdoor sealing, and any application where the material will be exposed to sunlight and weather over extended periods. Neoprene, on the other hand, is the better choice where contact with oils, solvents, or open flame is a regular concern. Side-by-Side Comparison Property EPDM Neoprene UV / Ozone Resistance Excellent Moderate Oil / Fuel Resistance Poor Good Flame Resistance Low (without additives) Good (inherently flame-retardant) Temperature Range -45°C to +150°C -40°C to +120°C Weather Resistance Excellent Moderate to good Abrasion Resistance Moderate Good Typical Roofing Use Flat roof membranes Rarely used for roofing Common Forms Sheet, membrane, sponge Sheet, foam, moulded parts Chemical Resistance Comparison For projects with specific chemical exposure concerns, this breakdown is useful: Chemical Exposure EPDM Neoprene UV radiation Excellent Moderate Steam Excellent Moderate Petroleum oils Poor Good Dilute acids Good Moderate Solvents (ketones, aromatics) Poor Moderate Ozone Excellent Moderate Animal/vegetable fats Moderate Good Physical Properties Comparison Property EPDM Neoprene Density ~0.86 to 1.2 g/cm³ ~1.23 g/cm³ Shore A hardness 40 to 90 40 to 95 Tensile strength Moderate Moderate to high Elongation at break High (up to 600%) Moderate (up to 400%) One thing that stands out when you look at the two compounds together is the cost difference. Neoprene is more expensive than EPDM, sometimes significantly so, depending on the grade and form. Material Relative Cost EPDM Baseline Neoprene 20 to 60% higher, depending on grade For roofing and general weatherproofing, that premium rarely justifies itself. But for industrial sealing or automotive applications where oil exposure is constant, the extra cost makes sense. Is EPDM Better Than Neoprene for Outdoor Use? In a word, yes. For any application involving prolonged outdoor exposure, EPDM is the stronger choice by a considerable margin. Its molecular structure resists UV degradation, ozone attack, and thermal cycling in ways that neoprene simply cannot match over the long term. Neoprene material is more susceptible to UV degradation over time compared to EPDM. In outdoor environments with constant sun and rain exposure, neoprene will break down faster, losing flexibility and developing surface cracks. For a roof that needs to perform for 25 years or more, that is a significant drawback. That said, neoprene does find some niche roofing-adjacent uses. Neoprene foam gaskets are sometimes used beneath fixings or flashings to create compression seals, and neoprene washers appear in certain mechanical fastening systems. But for the primary waterproof membrane itself, EPDM is the clear choice. There is also the question of swelling. EPDM can swell when exposed to petroleum-based oils or solvents, which is worth keeping in mind if the roof is near industrial exhaust outlets or grease vents. In those very specific situations, a protective coating or alternative material at the point of contact might be needed. For the vast majority of roofing projects, though, this is not a concern. EPDM vs Neoprene: Which Should You Choose? Choose EPDM if: Outdoor exposure to sunlight and weather is expected You need a roofing membrane for a flat roof project Ozone and UV resistance are critical requirements Cold flexibility matters (below -20°C applications) Budget is a factor and you want the lower-cost material The project involves waterproofing, pond lining, or exterior seals Choose neoprene if: Oil, fuel, or petroleum contact is regular Flame resistance is required for the application Vibration damping or impact absorption is needed Industrial sealing applications are involved Chemical resistance to hydrocarbons is a priority The operating environment is indoors or shielded from UV For roofing projects in Ireland, the choice is straightforward. EPDM is purpose-designed for prolonged outdoor exposure, handles Ireland's wet, variable climate without degrading, and remains flexible through freeze-thaw cycles. Membrane sheets are available in sizes large enough to cover most domestic roofs without seams, and installation is straightforward with contact adhesive bonding. Related Topics Worth Exploring If you are researching EPDM for a roofing project, these related guides may also be helpful: EPDM vs TPO roofing comparison EPDM performance in cold climates How to install EPDM roofing EPDM overlay installation guide EPDM lifespan and durability expectations Frequently Asked Questions Can neoprene be used as a flat roof membrane? Neoprene is not commonly specified as a flat roof membrane in Ireland or the UK. While it offers reasonable weather resistance in the short term, its UV tolerance is significantly lower than EPDM, which leads to faster degradation in outdoor environments. For gaskets, seals, and compression washers beneath roofing fixings, neoprene works well. But as a primary waterproofing layer exposed to direct sunlight and rain, EPDM is the far more reliable and cost-effective option for long-term roofing performance. Is EPDM rubber safe to use near drinking water systems? Yes, EPDM is widely approved for potable water contact in many countries, including for use in water tank linings, pipe seals, and reservoir covers. Specific grades are manufactured to meet drinking water safety standards, such as WRAS approval in the UK. Not every EPDM product carries this certification, so check the data sheet before using it in water-contact applications. For standard roofing use, potable water compliance is not typically required, but it shows the material's chemical inertness. Which synthetic rubber handles vibration damping better? Neoprene is generally considered the better option for vibration isolation and damping. Its molecular structure gives it strong resilience and energy absorption properties, which is why it appears frequently in industrial mounts, machinery pads, and anti-vibration systems. EPDM can absorb some vibration, but it is not typically selected for that purpose. If your project involves both roofing and vibration damping, such as rooftop plant equipment, you might use EPDM for the membrane and neoprene pads beneath the machinery. Does EPDM degrade when exposed to grease or cooking oils? EPDM can swell and soften when in prolonged contact with petroleum-based oils, greases, and hydrocarbon solvents. Cooking oils and animal fats have a milder effect, but extended exposure is still not ideal. For roofs near commercial kitchen extraction vents, it is worth considering a protective barrier or localised shielding at the point of exhaust discharge. Neoprene handles oil contact better, though it would not be used as the primary roofing surface. QBM can advise on protective accessories for these situations. Are there hybrid products that combine EPDM and neoprene properties? Some manufacturers produce EPDM neoprene blended rubber compounds that aim to offer a middle ground: improved oil resistance from the neoprene side and better weather tolerance from the EPDM side. These blends are more common in industrial gasket and sealing applications than in roofing. For flat roof membranes, pure EPDM remains the standard because the weather resistance requirements far outweigh any need for oil tolerance. Blended materials tend to be more expensive and are typically specified for custom rubber applications. Source Your EPDM Roofing Materials From QBM Choosing between EPDM and neoprene for your next project? For roofing applications in Ireland, EPDM is the clear choice, and QBM supplies a full range of EPDM rubber membranes, sheet materials, adhesives, and accessories to match. Contact the QBM team to discuss your requirements and find the right products for a reliable, long-lasting result.
- Essential Maintenance Practices for Bitumen Flat Roofing
Bitumen flat roofs protect thousands of commercial and residential buildings across Ireland. They're reliable, cost-effective, and when properly maintained, can provide decades of service. Yet many property owners only think about their flat roof when something goes wrong, and by then, what could have been a simple fix has become an expensive emergency. The good news? Most bitumen flat roof problems are preventable. Regular maintenance doesn't require specialist knowledge or complicated procedures. What it does require is attention, consistency, and understanding what to look for. This guide walks you through everything you need to know about maintaining a bitumen flat roof, from basic inspections to addressing common issues before they escalate. Whether you're managing a commercial property or looking after your own building, these practices will help protect your investment. Understanding Your Bitumen Flat Roof System Before you can properly maintain your roof, you need to understand what you're working with. Bitumen flat roofs aren't truly flat; they have a slight slope, typically around 1-3 degrees, to allow water drainage. The system consists of several layers working together to keep your building dry. Components of Bitumen Roofing Systems The typical bitumen flat roof includes a structural deck (usually timber or concrete), insulation boards, a vapour control layer, and the waterproofing membrane itself. Some systems have multiple layers of bitumen sheet, while others use modified bitumen membranes that combine asphalt with polymers for improved flexibility. Understanding these layers matters because problems can develop at any level. Surface damage is visible, but issues with underlying insulation or deck structure might not be obvious until significant damage has occurred. Different Types of Bitumen Membranes Traditional bitumen felt has protected roofs for over a century. More recently, modified bitumen systems have become popular, these include SBS (Styrene-Butadiene-Styrene) and APP (Atactic Polypropylene) membranes that offer improved performance in Irish weather conditions. Each type has different maintenance requirements. Traditional felt may need more frequent inspections, whilst modified bitumen systems generally require less intervention but benefit hugely from preventative care. Common Vulnerable Areas Certain parts of any bitumen roof are more prone to problems. Edges and perimeters, where the membrane meets walls or parapets, face particular stress from wind and temperature changes. Penetrations, anywhere pipes, vents, or equipment pass through the roof, represent potential weak points in the waterproofing. Seams where sheets overlap also deserve attention. These joints rely on proper bonding, and if that bond fails, water finds its way in. Perhaps surprisingly, the centre of the roof surface, whilst seeming more protected, can develop blisters from trapped moisture or degradation from UV exposure. Essential Tools and Equipment for Maintenance You don't need a lorry full of specialist equipment to maintain a bitumen flat roof properly. A modest toolkit covers most routine maintenance tasks, though safety equipment deserves serious consideration. Basic Maintenance Kit A stiff-bristled broom (not too stiff, you don't want to damage the membrane) handles most debris removal. A garden hose or pressure washer set to low pressure clears blocked drainage outlets. Binoculars let you inspect high or difficult areas from ground level before climbing up. Keep a camera or phone handy to document any issues you find. Photos from different angles help when discussing problems with contractors or tracking how issues develop over time. Safety Equipment You Actually Need Working at height is inherently risky. Proper safety equipment isn't optional, it's essential. Non-slip footwear with soft soles protects both you and the roof surface. If your roof lacks edge protection, you'll need fall arrest equipment or harnesses. Never work on a roof alone. Always have someone aware you're up there, ideally someone who can see you. Wet or icy conditions make roofs incredibly dangerous; if conditions aren't perfect, reschedule the maintenance. When to Call Professionals Some maintenance tasks genuinely require professional expertise. Anything involving significant repairs, working near edges without proper safety systems, or tasks requiring specialised equipment should be left to qualified contractors. Task Type DIY Possible? Professional Required? Visual inspection from the ground Yes No Debris removal Yes (with safety measures) Recommended for high roofs Drainage clearing Yes No Minor patch repairs Maybe (with experience) Recommended Seam repairs No Yes Blister treatment No Yes Structural damage No Absolutely yes Working near unprotected edges No Yes Creating a Maintenance Schedule Random, occasional roof checks aren't maintenance; they're hoping for the best. A proper schedule ensures nothing gets missed and problems get caught early. Twice-Yearly Inspections Spring and autumn represent ideal inspection times. Spring checks assess winter damage, freeze-thaw cycles, storm impacts, and accumulated debris. Autumn inspections prepare the roof for upcoming winter weather and clear summer growth. These aren't quick glances. Budget at least an hour for a thorough inspection of a typical commercial roof. Document everything, even if nothing looks wrong. "Roof looks fine" written in a notebook with the date, provides baseline information for future reference. Post-Storm Checks After any significant storm, particularly those with high winds or hail, inspect your roof as soon as safely possible. Storm damage that gets addressed immediately often costs far less to repair than the same damage left for weeks or months. Wind can lift membrane edges or tear material around vulnerable points. Hail can puncture surfaces or damage flashing. Debris blown onto the roof might seem harmless, but could be sitting on top of damage underneath. Quarterly Drainage Inspection Four times per year, check that drainage systems are clear and functioning. This takes maybe fifteen minutes, but prevents one of the most common and damaging problems, ponding water. Look for standing water that hasn't drained within 48 hours of rainfall. Check outlets and gutters for blockages. Verify that downpipes are clear and water flows freely. Regular Inspection Procedures Knowing when to inspect matters, but knowing what to look for, makes the difference between effective maintenance and wasted time. Visual Inspection From Ground Level Start every inspection from the ground. Binoculars let you spot obvious problems without climbing up. Look for sagging sections, visible tears, or areas where water pools. Check parapet walls for cracks or deterioration that might allow water behind the membrane. If you see nothing concerning from ground level, that's good news, but it doesn't mean you can skip the roof-level inspection. Some issues only become visible when you're actually on the roof surface. Surface Condition Assessment Once safely on the roof, walk the entire surface systematically. Don't just focus on problem areas from previous inspections; new issues can develop anywhere. Feel for soft spots underfoot. The surface should feel firm and stable. Spongy areas suggest trapped moisture or failing substrate underneath. These need professional assessment, as the problem likely extends beyond just the membrane. Look for cracks, tears, or splits in the material. Check whether mineral surfacing remains intact or has worn away, exposing the base membrane to UV damage. Examine areas around penetrations carefully; these stress points fail first. Checking for Ponding Water Perhaps nothing signals future problems more clearly than standing water. Visit the roof 48 hours after significant rainfall and look for pools that haven't drained. Mark these areas; they need attention. Slight ponding in isolated spots might not require immediate action, but widespread ponding or deepening pools indicate drainage issues or structural problems that will only worsen. Common Problems and Early Detection Catching problems early transforms expensive disasters into manageable repairs. Knowing what to look for helps you spot issues before they cause serious damage. Blistering: Causes and Identification Blisters appear as raised bubbles on the membrane surface. They form when moisture gets trapped between layers or beneath the membrane, then expands when heated by the sun. Small blisters might not leak immediately, but they represent weak points that will eventually fail. Don't walk on blisters; you might puncture them, creating immediate leaks. Note their location, size, and number. If blistering is widespread, the roof likely needs professional assessment and possibly complete resurfacing. Seam Separation and Edge Problems Seams where bitumen sheets overlap rely on bonding to stay watertight. Over time, thermal movement, water infiltration, or simply age can cause these seams to separate. Edge lifting often occurs first, and wind gets underneath and works the material loose progressively. Check seams carefully during inspections. They should lie flat with no gaps or lifted edges. Any separation needs prompt attention before water finds its way in. Cracking and Surface Degradation Bitumen becomes brittle with age, especially when exposed to UV radiation. Fine surface crazing might not immediately threaten waterproofing, but deep cracks certainly do. The difference isn't always obvious; if you're unsure whether cracks are superficial or serious, get a professional opinion. Surface weathering shows up as a colour change, loss of mineral granules, or a chalky appearance. This accelerates ageing and, whilst not an immediate emergency, suggests the roof is approaching the point where coating or replacement should be considered. Identifying Leak Sources Leaks aren't always obvious. Water can enter at one point, travel along beams or beneath insulation, then appear inside the building somewhere completely different. This makes leak detection quite challenging. Staining on the membrane surface suggests water is getting through somewhere nearby. Damp patches, particularly after dry spells following rain, indicate active leaks. Inside the building, ceiling stains or damp patches obviously signal problems, but determining exactly where water is entering requires careful investigation. Preventative Maintenance Tasks Prevention beats repair every time. Regular simple tasks dramatically reduce the likelihood of serious problems developing. Debris Removal Protocol Leaves, branches, moss, dirt, anything sitting on your roof holds moisture against the membrane and blocks drainage. Clear debris at least quarterly, more often if you have overhanging trees. Use a soft broom to avoid damaging the surface. Never use a pressure washer at high settings directly on the membrane. Be systematic, work in sections to ensure complete coverage. Moss and algae need different treatment. Biocidal solutions kill growth at the root, preventing rapid regrowth. Apply these carefully according to the manufacturer's instructions, ensuring they won't damage the membrane. Managing Foot Traffic Every time someone walks on your roof, they stress the membrane. Bitumen surfaces aren't designed as walkways, yet access for maintenance is necessary. This creates a dilemma. The solution? Minimise traffic and protect high-use areas. Place walkway pads or boards in routes regularly travelled, around HVAC equipment, near access hatches, and between commonly inspected points. These distribute weight and prevent localised wear. Educate anyone who needs roof access about proper procedures. Soft-soled footwear only. No dragging tools or equipment. Careful placement of ladders that won't damage the membrane. Vegetation Control Around the Roof Trees near buildings create problems for flat roofs. Overhanging branches drop leaves and debris, abrade surfaces in the wind, and provide routes for pests to access the roof. Perhaps more significantly, root systems from nearby trees can compromise building foundations, causing structural movement that stresses the roof. Trim branches well back from the roof, not just those touching it. Aim for at least two metres of clearance. If trees are causing persistent problems, consider whether they need to be removed entirely. Remove any plants growing on the roof itself immediately. Even small plants indicate trapped moisture and will worsen the problem as their roots penetrate the membrane. Drainage System Maintenance Water is bitumen flat roofing's enemy. Effective drainage is absolutely critical, yet drainage systems are often the most neglected aspect of roof maintenance. Gutter and Outlet Cleaning Blocked gutters and outlets cause water to back up, pond on the roof surface, and eventually find its way through any weakness in the waterproofing. They're also one of the easiest maintenance tasks to neglect, out of sight, out of mind. Check gutters quarterly at a minimum. Clear leaves, dirt, and any other accumulated material. Flush with water to confirm the flow is unrestricted. Inspect for signs that water has been overflowing or backing up. Internal drainage outlets, where water enters downpipes through the roof, need particular attention. These catch debris easily and might not show obvious signs of blockage until water is actually ponding. Remove outlet covers (they're usually just sitting in place), clear any accumulated material, and verify water flows freely. Checking for Adequate Slope Flat roofs need falls, slight slopes that direct water toward drainage points. These slopes are built into the structure or created with insulation boards. They should never be less than 1 in 80 (about 0.7 degrees), though 1 in 40 is preferable. Over time, structural settling or failing insulation can reduce these falls, creating areas where water ponds. This is difficult to assess during inspections unless you have original construction drawings showing intended drainage patterns. If ponding develops in areas that previously drained well, the structure may have sagged. This requires professional structural assessment, as simply patching the roof won't solve the underlying problem. Dealing With Ponding Water Issues Occasional minor ponding after heavy rainfall might not indicate serious problems, but if water regularly sits for more than 48 hours, action is needed. Temporary solutions include creating overflow routes or carefully increasing the slope with additional insulation. These buy time but don't address root causes. Permanent fixes might involve structural work, a complete drainage system redesign, or significant roof reconstruction. Never ignore persistent ponding. The weight alone stresses the structure, but the constant moisture accelerates membrane deterioration and inevitably leads to leaks. Minor Repairs and Patch Work Some repairs are genuinely straightforward. Others look simple but require professional expertise to execute properly. Knowing the difference prevents well-intentioned maintenance from making problems worse. Small Tear and Puncture Repair Minor tears or punctures, we're talking less than 50mm and not through all layers, might be patchable with compatible bitumen repair materials. The keyword is "compatible." Using the wrong product can cause more problems than it solves. Clean the damaged area thoroughly and let it dry completely. Apply the repair compound according to manufacturer's instructions, ensuring good bonding. For tears, you might need to reinforce with a fabric patch, then seal over the top. Here's the thing, though: if you're uncertain about the repair, leave it to professionals. A poor repair fails quickly and often causes additional damage during failure. When Patch Repairs Aren't Enough Multiple scattered patches, large damaged areas, or repairs that keep failing all suggest the roof has reached the point where comprehensive work is needed rather than continued patching. Think of it like an old car. At some point, continuous small repairs cost more than addressing the fundamental problem. The same applies to roofs; knowing when you've reached that point requires honest assessment. If your roof is approaching 20 years old and needs frequent repairs, comprehensive refurbishment or replacement probably makes more economic sense than continued patching. Understanding Your Limitations Some work simply requires professional expertise: seam repairs that need heat-welding, blister treatment that involves cutting and re-sealing, any work near unprotected edges, or repairs to flashings around penetrations. Your maintenance role is identifying problems early and addressing simple tasks. Knowing when to call professionals prevents small issues from becoming disasters and, frankly, prevents you from attempting dangerous or complex work without proper training. Seasonal Considerations for the Irish Climate Ireland's weather, mild but wet, with significant wind, creates specific challenges for bitumen flat roofs. Seasonal maintenance addresses these challenges proactively. Autumn Preparation Autumn is about preparing for winter. This means clearing accumulated summer growth, checking drainage is completely clear before leaf fall, and verifying the membrane is in good condition before harsher weather arrives. Moss and algae growth accelerate during warm, damp conditions. Treating these now prevents them from causing problems through winter. Check edges and flashings are secure, winter wind will find and exploit any weaknesses. Verify all drainage runs freely. Once leaves start falling in earnest, drainage can become blocked quickly, so getting ahead of the problem makes sense. Winter Monitoring Winter isn't ideal for major maintenance, but monitoring continues. After storms, inspect for visible damage as soon as safely possible. Check that drainage hasn't become blocked by wind-blown debris. Ice and snow accumulation can stress structures, particularly if drainage is impaired and water freezes in place. Excessive snow loading might require careful removal, though this is specialist work; attempting it yourself could be dangerous. Watch for icicles or ice dams forming around drainage points. These suggest blocked outlets or inadequate insulation causing heat loss that melts snow, which then refreezes at colder roof edges. Spring Inspection and Remediation Spring brings the crucial post-winter inspection. Look for damage from freeze-thaw cycles, which can crack membranes or open seams. Check drainage thoroughly; winter debris needs clearing before spring rainfall. This is the time to address any issues discovered during winter monitoring. Schedule repairs whilst the weather is improving, but before the summer sun makes working on dark bitumen surfaces uncomfortably hot. Summer Maintenance Tasks Summer offers ideal conditions for many maintenance tasks. The membrane is pliable from warmth, making inspection easier. The weather is generally more predictable, allowing planned work to proceed without weather delays. However, working on a dark bitumen roof in direct summer sun is genuinely unpleasant and potentially dangerous due to heat stress. Schedule work for early morning or late afternoon, and ensure anyone working takes regular breaks. Summer is also when UV degradation accelerates. If your roof needs a protective coating, summer provides good application conditions while highlighting areas where UV damage has progressed. Working Safely on Bitumen Flat Roofs Safety isn't just about avoiding accidents, though that's obviously critical. It's about creating conditions where thorough maintenance can happen without unnecessary risk. Access and Fall Protection How you get onto the roof matters enormously. Ladders need to be properly secured, extend well above the roof level, and be positioned at the correct angle. If accessing via internal hatches, ensure these are properly maintained and provide safe egress. Fall protection requirements depend on roof height, edge protection, and local regulations. Generally, any work above 2 metres requires fall protection measures. This might mean edge barriers, harnesses with secure anchor points, or working platforms. Never work near unprotected edges. The consequences of a fall from even a relatively low roof can be catastrophic. If edge work is necessary, use proper fall arrest equipment or consider whether professionals should handle it. Weather Considerations Wet roofs are slippery roofs. Don't work in the rain, and wait for surfaces to dry after rainfall. Frost and ice obviously make surfaces treacherous. Wind also creates significant hazards, not just from being blown over, but from tools or materials becoming projectiles. If conditions aren't ideal, reschedule. No maintenance task is so urgent that it's worth risking injury. Load Limitations and Surface Protection Bitumen flat roofs have weight limits. The structure underneath determines how much load the roof can support, including the weight of people and equipment. Never store materials or equipment on the roof long-term. Even temporary storage should be carefully considered, distributing weight across large areas rather than concentrating it in small spots. When placing ladders on the roof surface, use boards underneath to spread the load. The same applies to any heavy tools or equipment. Material Quality and Roof Longevity Maintenance keeps roofs performing well, but the materials used during initial installation or repairs fundamentally determine how well the roof can be maintained and how long it will last. Importance of Compatible Materials Using incompatible materials for repairs creates problems. Different bitumen types, adhesives, or sealants might not bond properly or could chemically react, causing premature failure. Always verify that repair materials are compatible with your existing membrane. Product data sheets specify compatibility; check before purchasing. When in doubt, consult the original manufacturer or material supplier. Quality Specifications for Repairs Not all bitumen repair materials offer equal performance. Budget products might seem attractive, but poor-quality repairs fail quickly, often causing additional damage in the process. Specify materials designed for your climate conditions. Ireland's wet weather requires products proven to perform in high-moisture environments. UV resistance matters for exposed surfaces. Flexibility is essential to accommodate thermal movement. Quality materials cost more upfront but provide better, longer-lasting results. This is particularly true for critical repairs or areas subject to high stress. When to Consider Complete Refurbishment Sometimes, ongoing maintenance stops making economic sense. If your roof needs frequent repairs, if problems develop in multiple areas, or if the membrane has simply reached the end of its useful life, refurbishment or replacement becomes more cost-effective. Professional assessment helps determine whether you're at this point. A roof survey identifies the extent of underlying problems that might not be obvious during routine inspections. Modern roofing systems often offer improved performance over older materials. New coatings, better membranes, enhanced insulation, and refurbishment provide an opportunity to upgrade as well as repair. Documentation and Record Keeping Good records transform maintenance from reactive to proactive. They help identify developing patterns, support warranty claims, and provide essential information when problems arise. Inspection Logs Keep written records of every inspection. Note the date, weather conditions, what you checked, and what you found, even if you found nothing wrong. Photograph anything from consistent angles to track changes over time. These logs become invaluable. They show maintenance history if you sell the property. They provide evidence of proper care if warranty claims arise. They help identify whether problems are new or have been developing slowly. Maintenance History Record every maintenance task performed: what was done, when, by whom, and what materials were used. Keep receipts and product specifications for any materials purchased. This history is particularly important for repairs. If a repair fails, knowing exactly what materials were used and how they were applied helps diagnose why the failure occurred and what should be done differently. Professional Work Records When contractors perform work, ensure you receive detailed reports including materials used, work performed, and any warranties provided. Keep these documents indefinitely; they're part of your building's permanent record. Good contractors provide thorough documentation without being asked. If a contractor can't or won't provide detailed records of work performed, consider whether they're the right choice for your project. Frequently Asked Questions How often should I actually walk my bitumen flat roof for maintenance purposes? A thorough visual inspection twice yearly represents the minimum, typically in spring and autumn. However, quarterly checks on drainage systems and debris accumulation provide better protection. Post-storm inspections should occur after any severe weather event. The specific frequency depends on your roof's age, nearby vegetation, and building use. Older roofs or those with past problems benefit from more frequent attention. Commercial buildings with rooftop equipment need more regular access and, therefore, more frequent condition checks than simple residential flat roofs with minimal traffic. Can I pressure wash debris off my bitumen flat roof? Pressure washing can damage bitumen membranes if done incorrectly. Never use high pressure directly on the surface; you risk dislodging mineral surfacing, forcing water under seams, or even puncturing the membrane. If using a pressure washer, keep the pressure below 1000 PSI and maintain a significant distance from the surface. For most debris removal, a stiff-bristled broom works better and safer. Pressure washing is more appropriate for clearing drainage outlets and gutters than for general roof surface cleaning. Always test on a small, inconspicuous area first if you're uncertain. What's the difference between preventative maintenance and reactive repairs on bitumen roofs? Preventative maintenance involves regular scheduled tasks, clearing debris, checking drainage, removing vegetation, and inspecting for early signs of problems. These activities stop issues from developing in the first place. Reactive repairs respond to identified problems after they've occurred. The distinction matters because preventative maintenance costs dramatically less than reactive repairs. For instance, clearing a blocked outlet costs perhaps twenty pounds in time; fixing the leak that develops from prolonged ponding costs thousands. A well-maintained roof spends most of its budget on prevention; a neglected roof spends everything on repeated crisis repairs. My roof has some soft spots, but it isn't leaking yet. How urgent is this? Soft spots indicate serious underlying problems even without active leaks. They typically mean insulation has become saturated, the deck is deteriorating, or moisture has compromised structural integrity between roof layers. These problems worsen rapidly and can lead to sudden failure. Get a professional assessment immediately. Soft spots rarely improve on their own and always deteriorate further. The longer you wait, the more expensive repairs become. What might currently need localised repair could quickly require complete roof replacement if structural damage spreads. Consider soft spots an emergency requiring urgent professional attention. Are bitumen flat roof coatings worth applying as part of maintenance? Quality reflective coatings can extend bitumen roof life by 5-10 years when applied to roofs in reasonable condition. They provide UV protection, reduce surface temperatures, improve waterproofing, and can address minor surface degradation. However, coatings aren't magic solutions for roofs with serious structural problems, extensive damage, or failing membranes. They work best as preventative measures or minor restoration for roofs approaching but not exceeding their expected lifespan. Professional assessment determines whether your roof is a good candidate for coating or needs more substantial intervention. The coating's performance also depends heavily on proper surface preparation and application technique. Source Premium Bitumen Roofing Materials from QBM Effective maintenance starts with quality materials. Whether you're sourcing repair products, protective coatings, or complete membrane systems, the materials you specify make the difference between repairs that last and those that fail prematurely. QBM supplies professional-grade bitumen roofing materials throughout Ireland, helping contractors and property managers maintain their flat roofs to the highest standards. Our team understands Irish weather conditions and can guide you toward materials proven to perform in our climate. Contact QBM today to discuss your bitumen flat roof maintenance requirements or to get expert recommendations on repair materials and protective systems for your property.
- Understanding Modified Bitumen Roofing
Modified bitumen is one of the most widely used waterproofing systems for flat and low-slope roofs across Ireland, particularly on commercial, warehouse, and industrial buildings. It combines the proven waterproofing performance of bitumen with polymer modification to improve flexibility, durability, and resistance to cracking. If you’re comparing flat roof options, understanding how modified bitumen works (and how it’s installed) will help you choose a system that performs reliably over time. What Is Modified Bitumen Roofing? Modified bitumen is an incredibly sturdy yet flexible asphalt membrane that's been enhanced with polymer additives. Think of it as traditional bitumen roofing that's been upgraded for better performance. The material combines asphalt with either rubber-based polymeric binders or plastic modifiers, all reinforced with a layer of polyester or fibreglass for extra strength. The term "modified" refers specifically to how the bitumen has been altered with these polymers. This modification process transforms standard asphalt into something far more durable and adaptable to different weather conditions. Most mod-bit roofing systems consist of multiple layers – typically two or more – creating what's known as a multi-ply system. This layered approach provides better waterproofing protection than single-layer solutions. The Composition Behind the Material At its core, modified bitumen membranes start with bitumen (a petroleum-based material) that gets mixed with polymers during manufacturing. The addition of synthetic rubber or plastic compounds changes the physical properties of the asphalt, making it either more elastic or more heat-resistant, depending on which polymers are used. Reinforcement materials – usually fibreglass or polyester – are embedded within the membrane during production. These reinforcements give the finished product its high tensile strength and resistance to tears. How It Differs from Traditional Asphalt Built-up roofing systems (BUR), which have been around for over a century, require multiple alternating layers of hot asphalt and roofing felt to be applied on-site. It's a labour-intensive process that can take considerable time. Modified bitumen simplifies this. The material arrives ready to install in roll format, with the polymers already integrated. This means faster installation and, quite frankly, less mess on the job site. Types of Modified Bitumen Systems When you're selecting materials for a roofing project, you'll encounter two main types of modified bitumen membranes. Each has distinct characteristics that make it suited to particular applications. SBS Membranes SBS (Styrene-Butadiene-Styrene) modified bitumen behaves a bit like rubber. The synthetic rubber modification gives these membranes remarkable flexibility and elastic properties. They remain pliable even in cold weather, which makes them particularly well-suited to the Irish climate, where temperature swings can be quite dramatic. This flexibility means SBS systems handle thermal movement exceptionally well. When buildings expand and contract with temperature changes, SBS membranes flex rather than crack. They're also more forgiving during freeze-thaw cycles, which is something worth considering given our winters. SBS membranes can be installed using several methods – torch application, cold adhesives, or even hot mopping. This versatility in installation options often appeals to contractors who might have preferences based on the specific job conditions. APP Membranes APP (Atactic Polypropylene) modified bitumen has plastic-like qualities that make it quite different from SBS. The plastic modification gives these membranes superior UV resistance and a higher melting point. Because APP membranes can tolerate higher temperatures during installation, they're somewhat more forgiving when being torch-applied. This characteristic has made them popular for smaller residential projects or situations where precision during installation might be challenging. APP roofing excels at shedding water efficiently. The material's composition promotes effective water runoff, reducing the risk of ponding water on flat surfaces. Feature SBS Modified Bitumen APP Modified Bitumen Base Material Synthetic rubber (elastic) Plastic polymers (rigid) Flexibility Highly flexible, remains elastic in cold Less flexible, more rigid Temperature Performance Better in cold climates Better UV resistance Installation Methods Torch, cold adhesive, hot mop Primarily torch-applied Best For Variable climates, commercial buildings Warmer climates, residential projects Key Benefits and Practical Advantages So why do building professionals keep coming back to modified bitumen? The advantages are quite compelling when you look at the complete picture. The waterproofing protection offered by these systems is excellent. Multi-ply mod-bit installations create multiple barriers against water penetration, which is obviously crucial for any flat roof application. The material itself is highly waterproof by nature, but the layered installation approach adds redundancy. Tear resistance is another major benefit. Modified bitumen membranes have extremely strong tensile properties. They resist punctures from foot traffic, wind-driven debris, and other hazards that might damage lesser materials. This durability means fewer emergency repairs and lower maintenance costs over the roof's service life. Energy efficiency considerations have become increasingly important. Some modified bitumen products offer good UV reflection, which helps reduce cooling costs during warmer months. The insulation values can be tailored based on project requirements, though that's typically handled through separate insulation layers rather than the membrane itself. Installation is relatively straightforward compared to some alternatives. Contractors familiar with bitumen systems can typically complete mod-bit installations efficiently. The rolled membrane format makes handling easier, and repairs can be executed quickly if damage does occur. Perhaps what's most appealing is the track record. Modified bitumen systems have been protecting commercial buildings for decades. There's something reassuring about choosing a material with proven long-term performance rather than gambling on newer, less-tested alternatives. Installation Methods and Considerations Understanding how modified bitumen gets installed helps explain both its popularity and its limitations. Torch-down application remains the most common installation method. Contractors use propane torches to heat the underside of the membrane until it melts slightly, then roll it out onto the prepared substrate. As the material cools, it bonds to the surface below. This creates a robust, waterproof seal that's difficult to beat. The torch method does produce noticeable odours during installation. It's not pleasant, and building occupants may need to relocate temporarily. The fumes can be quite strong, though proper ventilation helps considerably. Cold adhesive systems offer an alternative that eliminates the torch and its associated fumes. Special adhesives bond the membrane to the substrate without requiring heat. This approach works well in situations where fire safety is a concern or when working near sensitive equipment. Self-adhering membranes represent a third option. These materials have a peel-and-stick backing that bonds directly to the roof deck. While convenient, they're generally considered less reliable than torch-applied systems for long-term performance. Regardless of installation method, proper substrate preparation is essential. The existing roof deck must be clean, dry, and structurally sound. Any deficiencies in the substrate will compromise the new roofing system's performance. Common Applications for Modified Bitumen Modified bitumen excels in specific scenarios, which is why you'll find it on certain building types more than others. Commercial properties with flat or low-slope roofs represent the primary application. Warehouses, retail centres, office buildings, and light industrial facilities frequently specify mod-bit systems. The material handles the thermal stress from Ireland's weather patterns quite well. The roofing system works particularly well on structures where foot traffic is expected. Mechanical equipment requiring regular maintenance, HVAC units needing servicing, or rooftop access for various purposes – modified bitumen can handle these demands better than some single-ply alternatives. Residential applications are less common but not unheard of. Flat-roofed extensions, garages, and modern architectural designs sometimes incorporate modified bitumen membranes. The material's durability appeals to homeowners wanting long-lasting protection. Industrial facilities benefit from mod-bit's resistance to various chemicals and environmental stresses. Manufacturing plants, processing facilities, and similar structures often choose these systems for their reliability. Low-slope roofs present specific challenges that modified bitumen addresses effectively. The material's waterproofing capabilities and its ability to handle ponding water (to a degree) make it suitable for roofs with minimal pitch. Maintenance and Lifespan Expectations No roofing system is truly "install and forget," though modified bitumen comes reasonably close with proper care. A typical lifespan is often in the 15–35 year range, depending on: system selection and surfacing detailing quality wind exposure and roof traffic drainage performance inspection and repair regime A professionally installed system will significantly outlast a rushed or poorly executed one. Regular maintenance extends life considerably, while neglect shortens it. Climate impact shouldn't be underestimated. Ireland's wet conditions and temperature variations do stress roofing materials over time. Modified bitumen handles these conditions reasonably well, but the Irish climate isn't exactly gentle on any roofing system. Routine Care Requirements Semi-annual inspections represent the cornerstone of proper maintenance. Spring and autumn checks allow you to identify small issues before they become expensive problems. After severe storms – particularly those involving high winds or hail – additional inspections are advisable. During inspections, look for obvious damage: tears, punctures, loose seams, or areas where the membrane might be pulling away from the substrate. Check drainage points to ensure water isn't pooling anywhere it shouldn't be. Minor repairs are typically straightforward. Small tears or punctures can be patched using compatible modified bitumen material and appropriate sealants. Larger problems obviously require professional attention. Keep the roof surface clear of debris. Leaves, branches, and other accumulations hold moisture against the membrane and can promote deterioration. Regular cleaning – just sweeping off debris, really – goes a long way toward extending the roof's life. Frequently Asked Questions How long does modified bitumen roofing typically last in Irish conditions? Modified bitumen systems generally last between 15 and 35 years in Ireland, though this varies based on installation quality, maintenance practices, and specific site conditions. Our climate's combination of moisture and temperature fluctuations does impact longevity. Regular inspections and prompt repairs help maximise the lifespan. Buildings with good drainage and minimal foot traffic typically see systems lasting toward the upper end of this range. Proper specification of the correct membrane type for your specific application also influences durability. Can modified bitumen be installed over existing roofing materials? In many cases, yes, though this depends on the existing roof's condition. The substrate must be structurally sound, dry, and properly prepared before applying new modified bitumen. Wet or damaged insulation underneath needs to be replaced first. A thorough roof survey identifies whether overlay installation is viable or whether a complete tear-off makes more sense. Sometimes adding new roofing over old creates problematic weight loads or traps moisture, so a professional assessment is important before proceeding. What's the difference between mod-bit and traditional built-up roofing? Built-up roofing requires multiple layers of hot asphalt, and roofing felt applied on-site, creating a thick, heavy system. Modified bitumen arrives as factory-made rolls with polymers already integrated, making installation faster and cleaner. Mod-bit systems are lighter weight, more flexible, and generally easier to maintain. Both provide multi-layer waterproofing protection, but modified bitumen's polymer enhancement gives it better performance in temperature extremes. The installation process for mod-bit also produces less on-site mess compared to traditional BUR systems. Does modified bitumen work well for buildings with heavy rooftop equipment? Modified bitumen handles rooftop equipment quite effectively. The material's high tensile strength resists punctures and tears from foot traffic around mechanical systems. Its durability makes it sensible for roofs requiring regular maintenance access. However, equipment placement still requires proper planning – walkway pads, equipment curbs, and appropriate load distribution remain important. The membrane itself won't fail under normal foot traffic, but concentrated point loads or sharp edges obviously need consideration. Many commercial buildings with extensive rooftop HVAC installations successfully use mod-bit systems. Are there environmental considerations with modified bitumen roofing? Modified bitumen is a petroleum-based product, which raises environmental questions. The torch application process releases emissions during installation, though this is temporary. Some manufacturers now offer products with recycled content, reducing the environmental impact somewhat. The material's longevity means less frequent replacement compared to shorter-lived alternatives, which arguably offsets some environmental concerns. At the end of life, proper disposal is important. Some modified bitumen can be recycled, though this depends on local facilities. Specifying lighter-coloured or reflective-surfaced membranes can improve energy efficiency during the roof's service life. Partner with QBM for Quality Roofing Materials Choosing the right roofing materials makes all the difference in how your project performs over the years. Modified bitumen systems offer proven reliability for commercial and industrial applications across Ireland. At QBM, we supply premium modified bitumen membranes and complementary roofing materials for contractors throughout Ireland. Our team understands the specific demands of Irish weather conditions and can help you select the most suitable products for your project requirements. Contact QBM today to discuss your roofing material needs or to get expert guidance on selecting the right modified bitumen system for your next project.